Payment Links- Advanced Settings

When creating your payment plans you will see the Advanced tab (just under the payment type choice. There are several more options for you to utilise (all optionally).
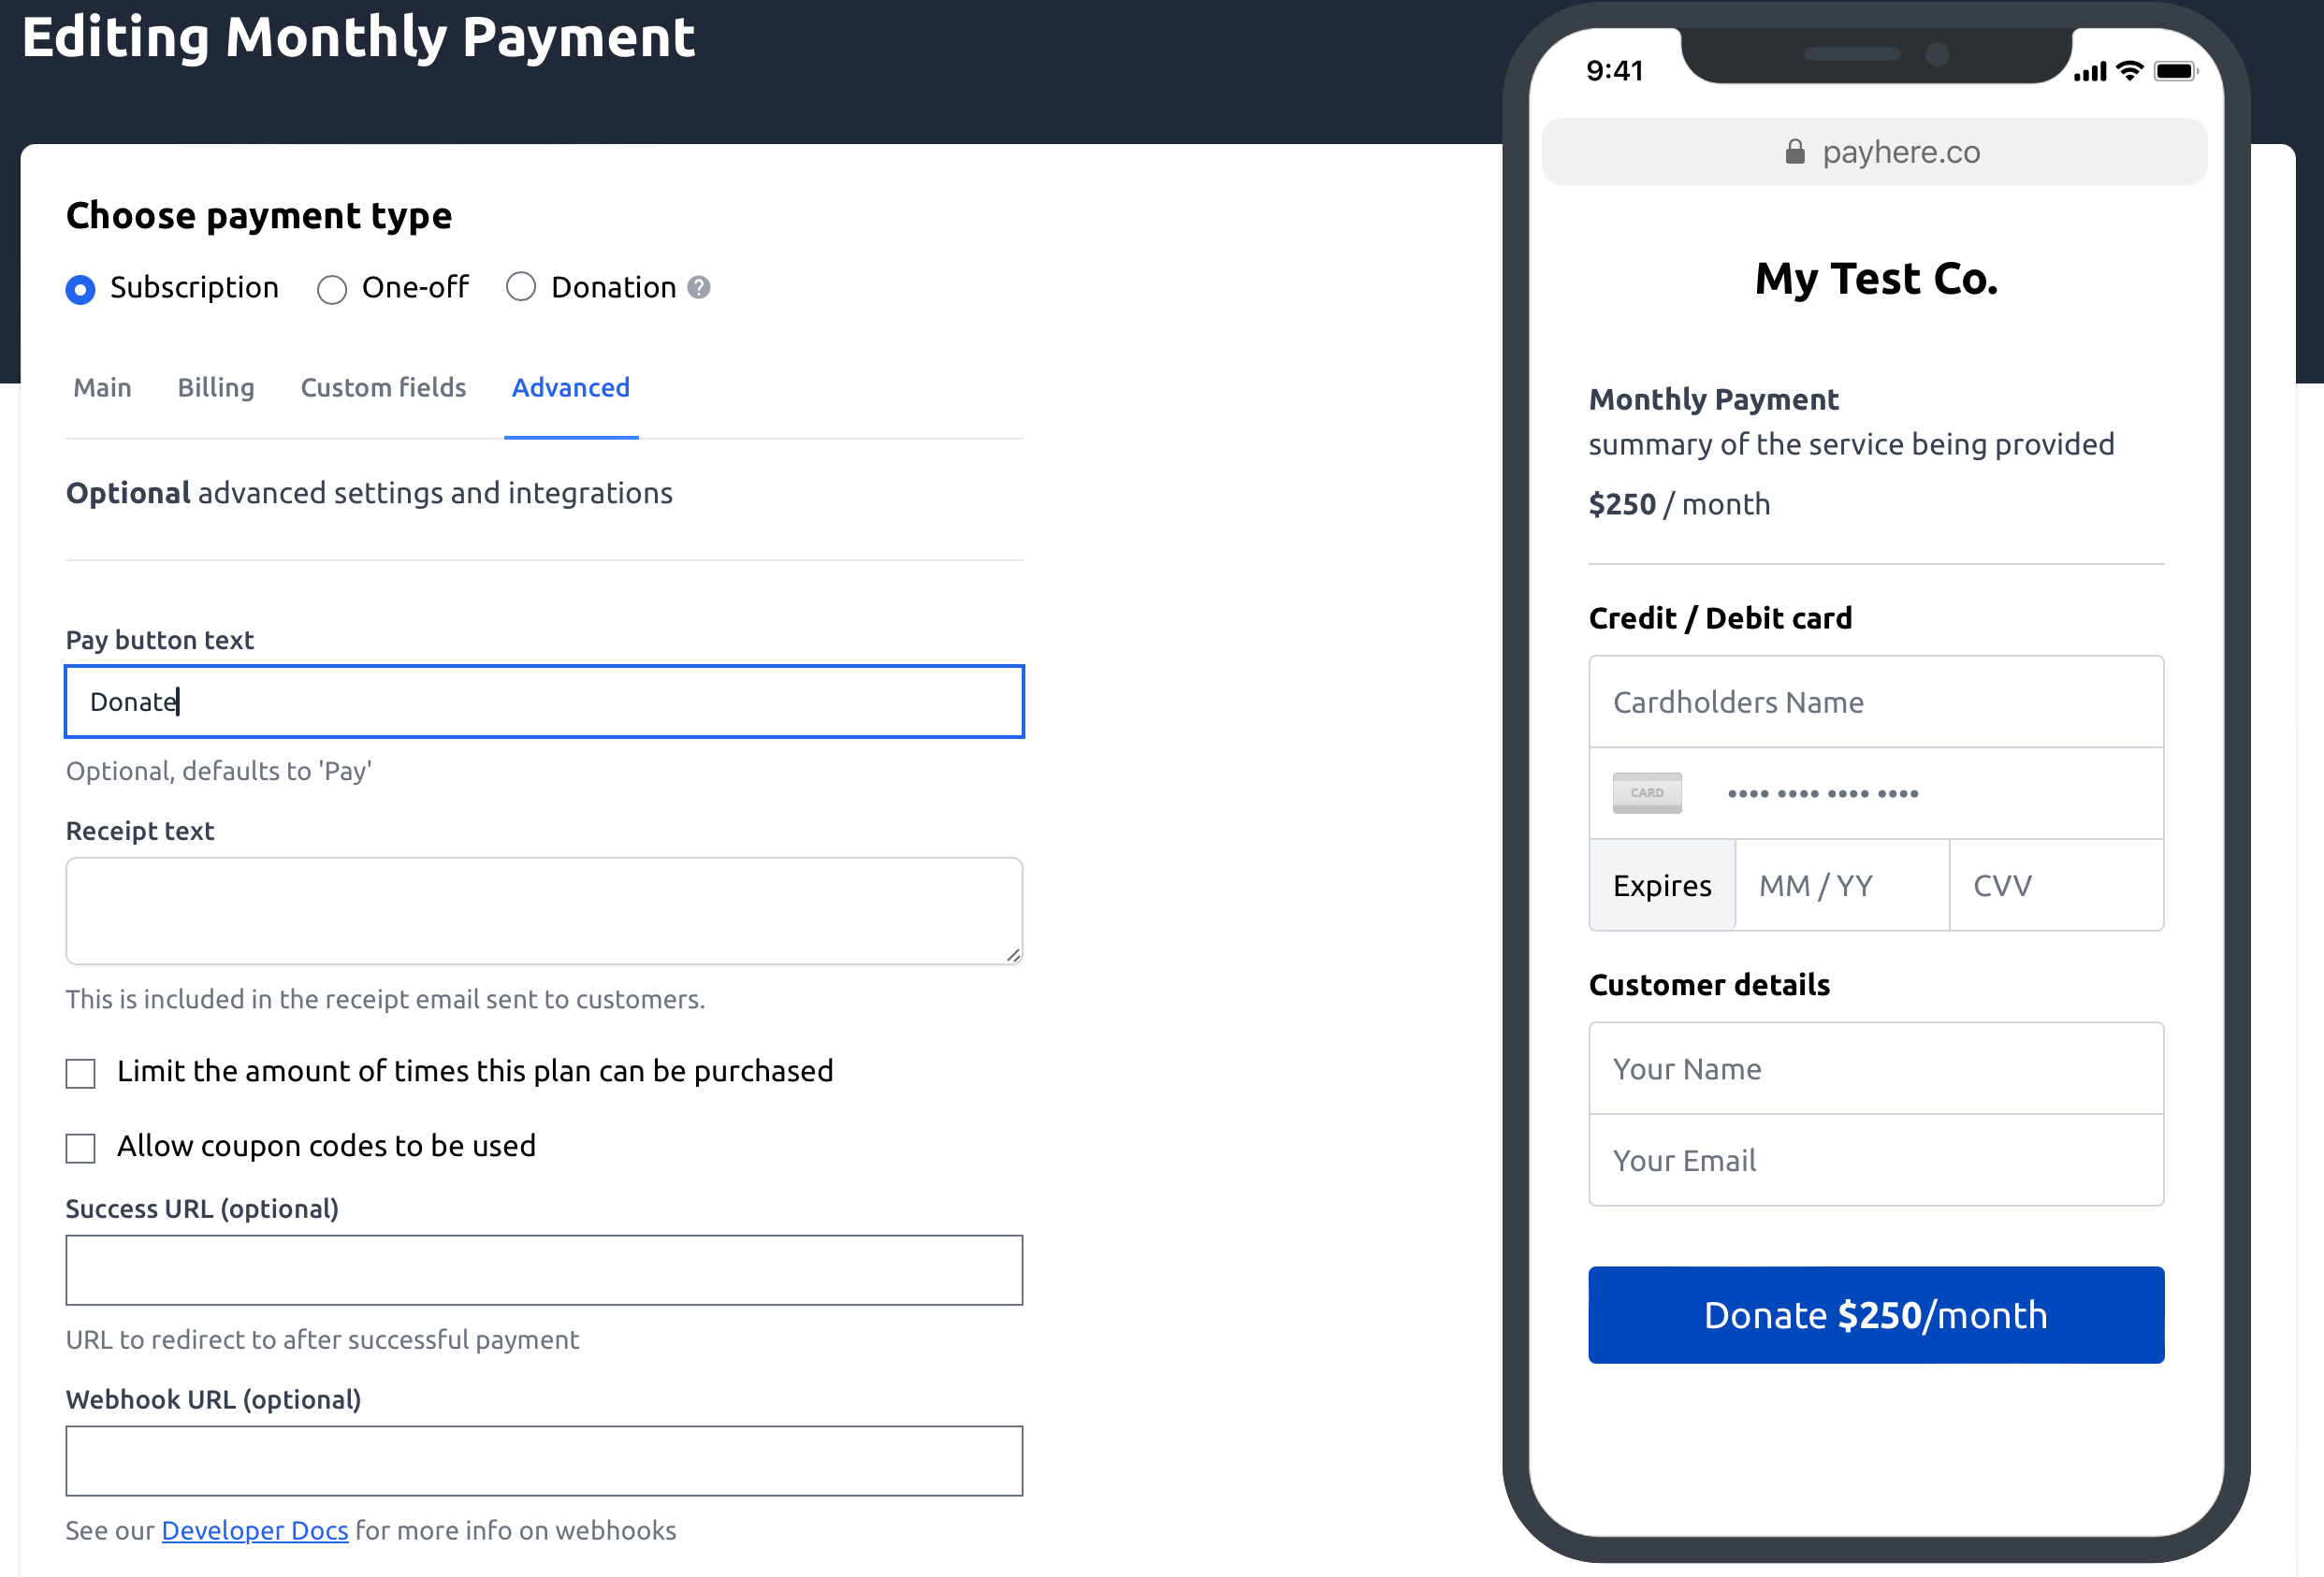
1. Pay button text
This allows you to change the text on the payment button- you could have give now, get started or even donate as I have shown below.
2. Reciept Text
This allows you to enter custom messaging that will be assocaiated to just the plan that you are creating. This could be instructions or next steps. It will be included in the reciept email that we automatically send to your customer/ donor after they hae made a payment.
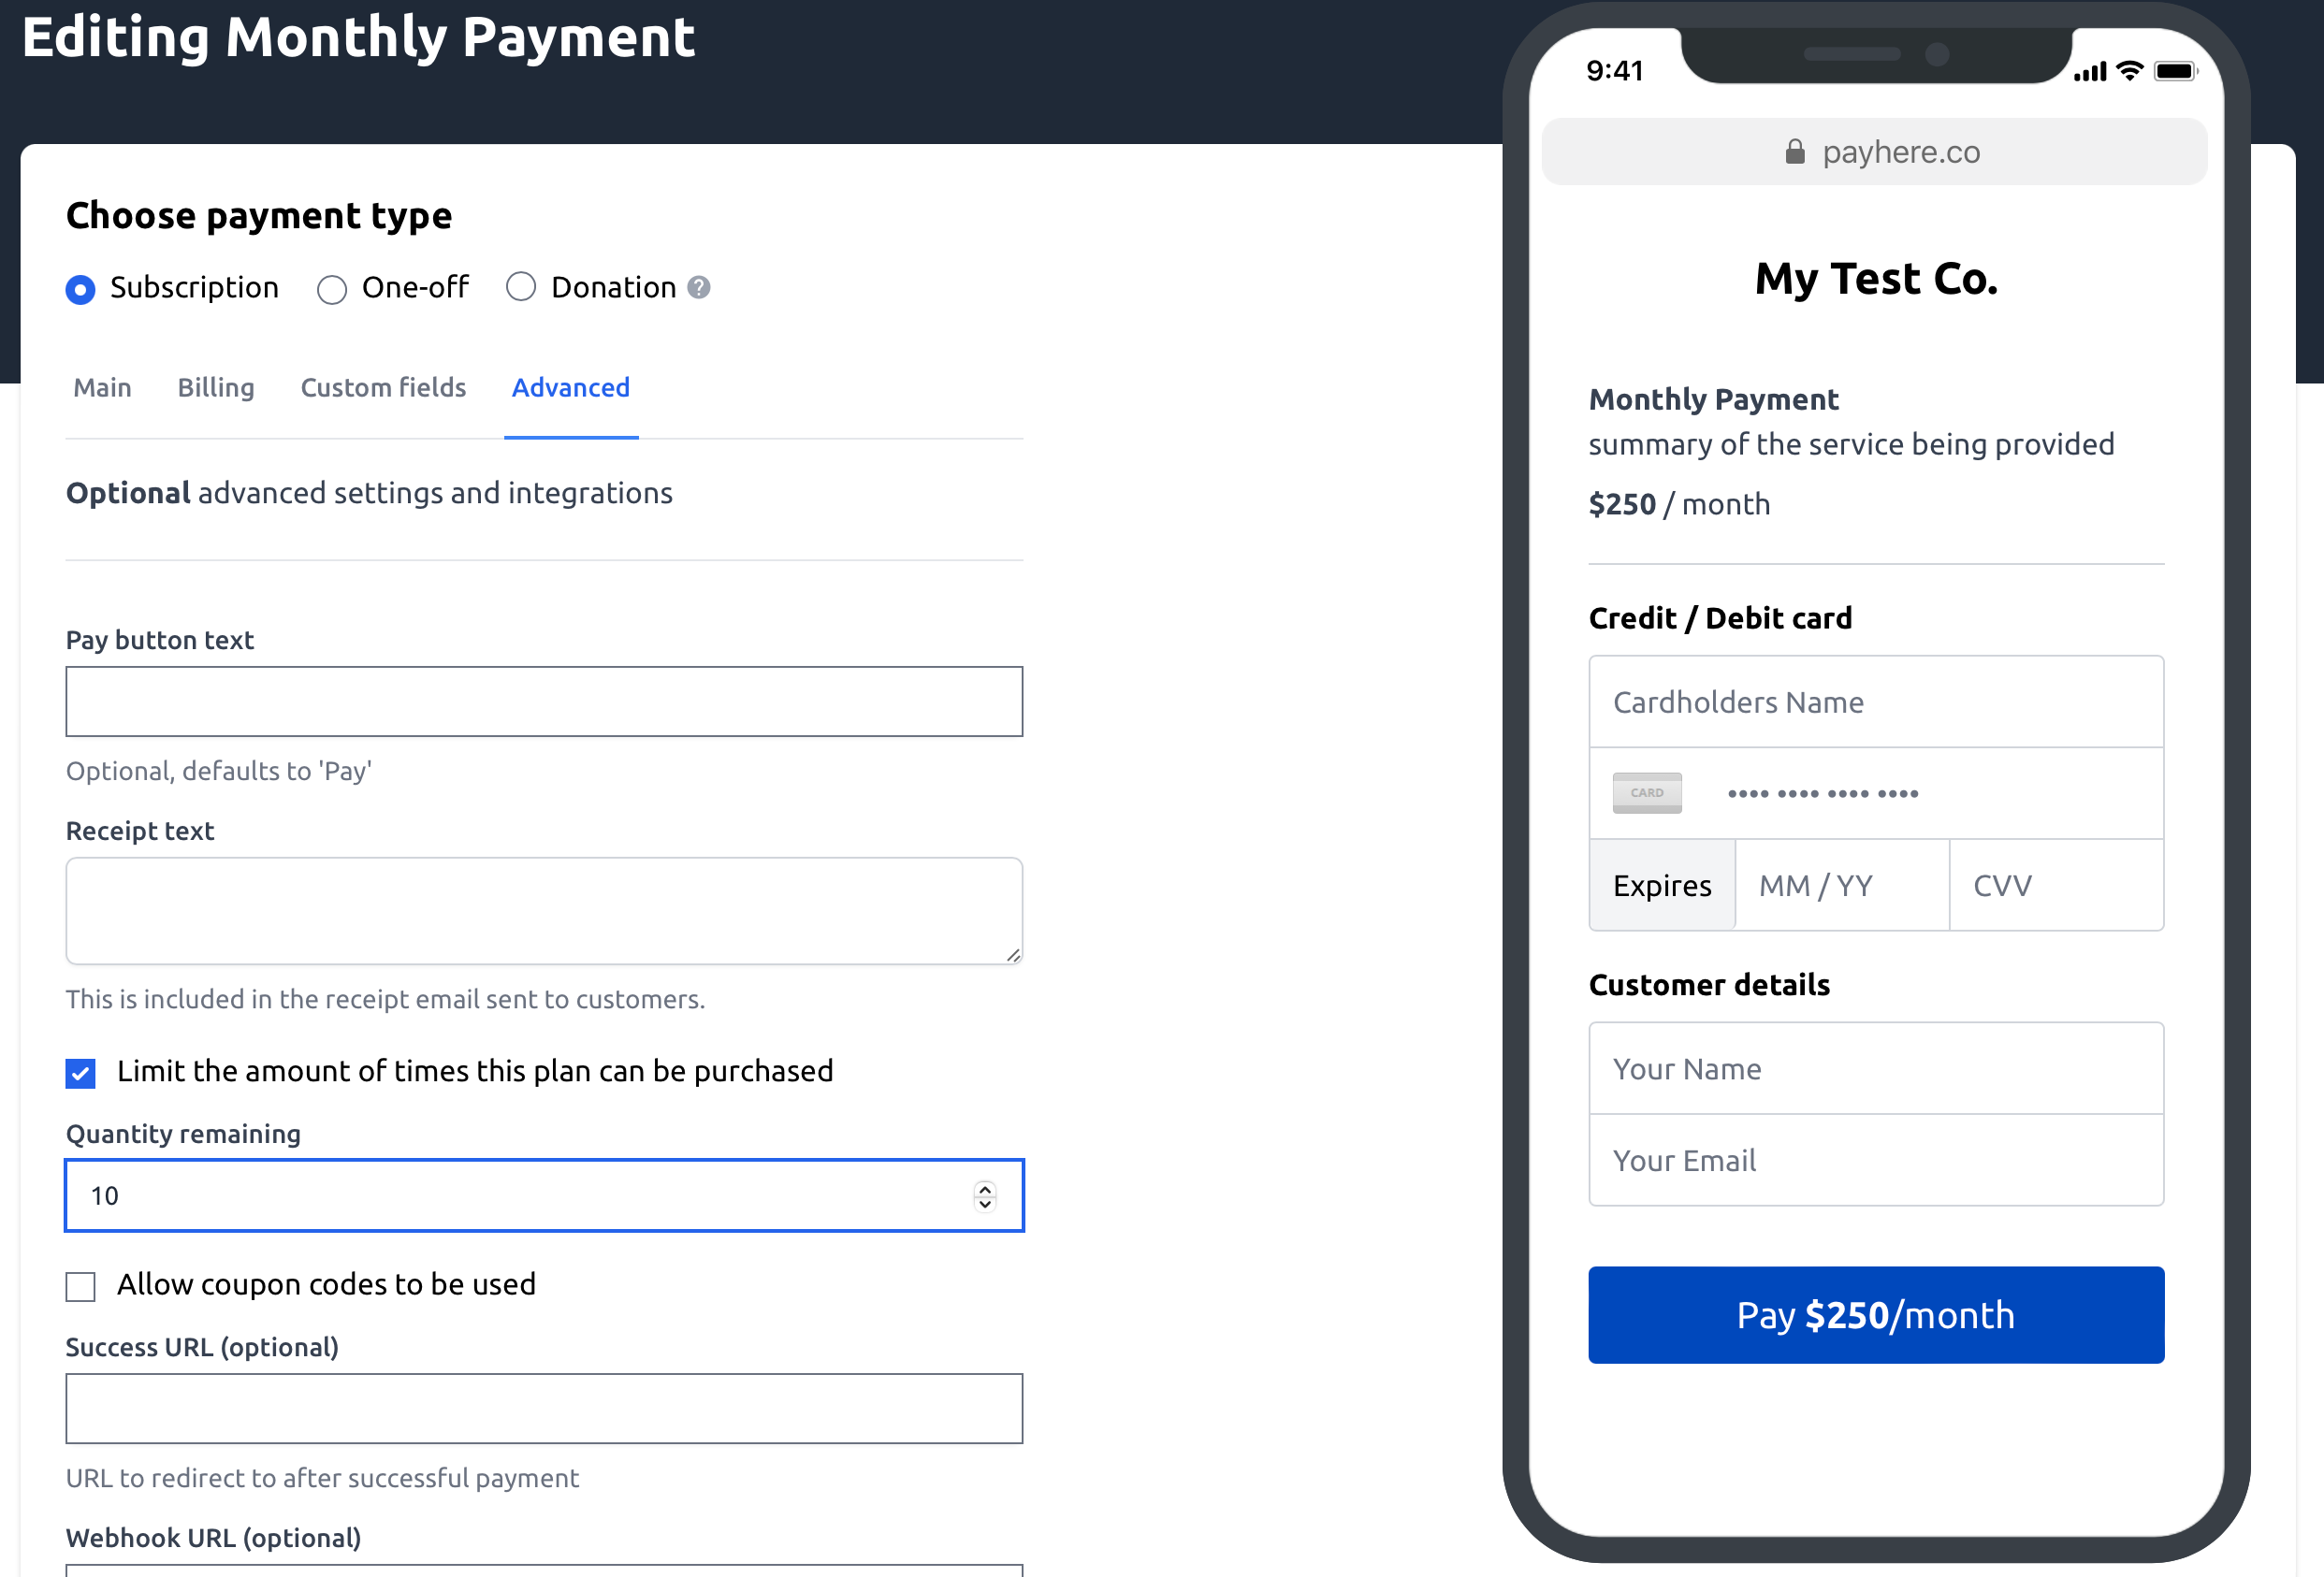
3. Limit amount of purchase
This will allow you set a pre-determined number of purchases allowed. For example if you only had 10 spaces available for the service you were selling. I have shown below how this is configured.
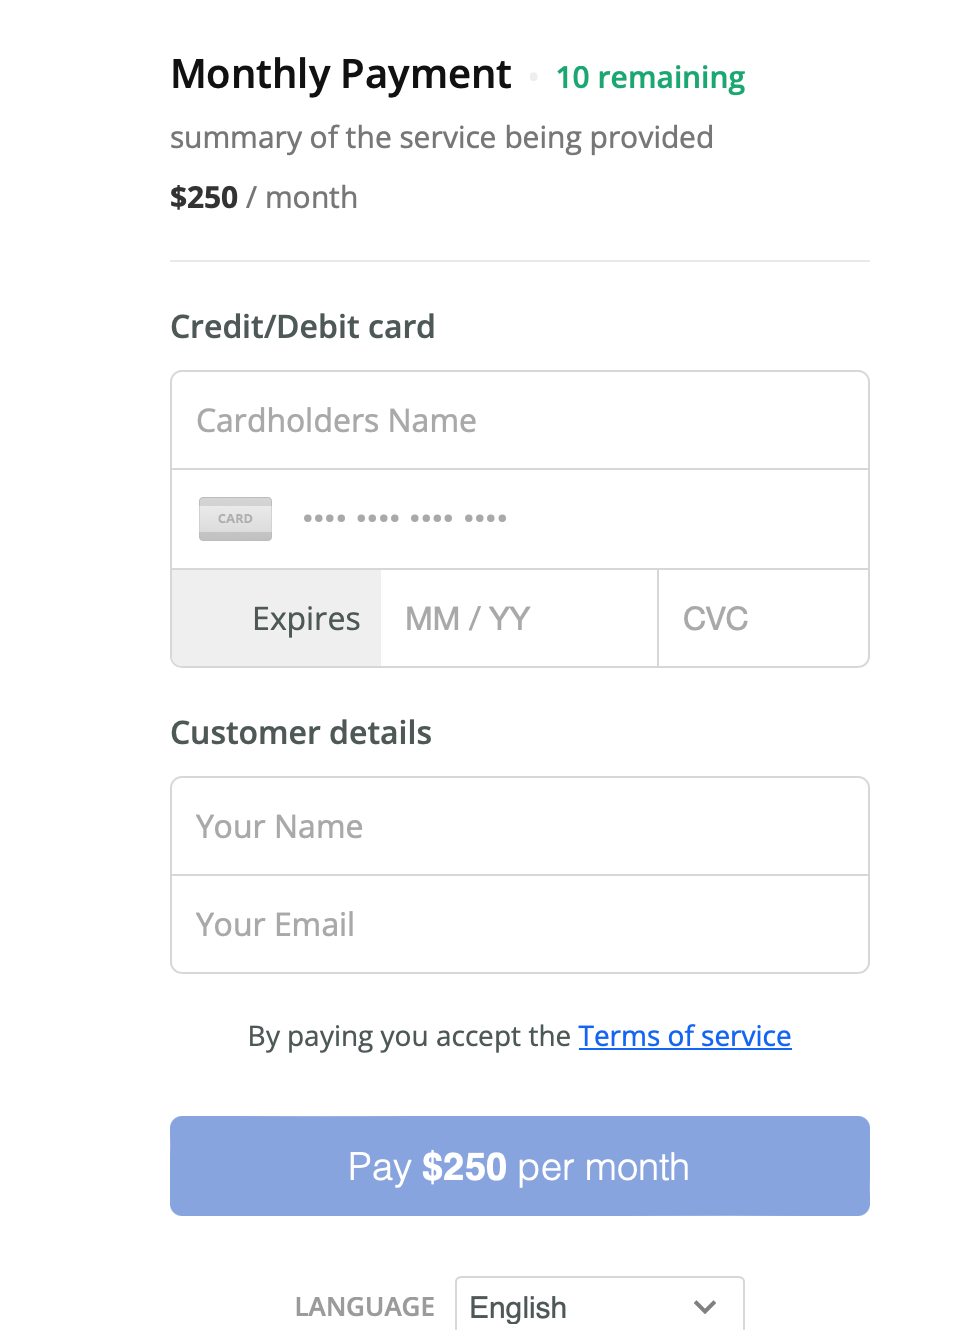
Below is an example of what people checking out the payment link will then see.
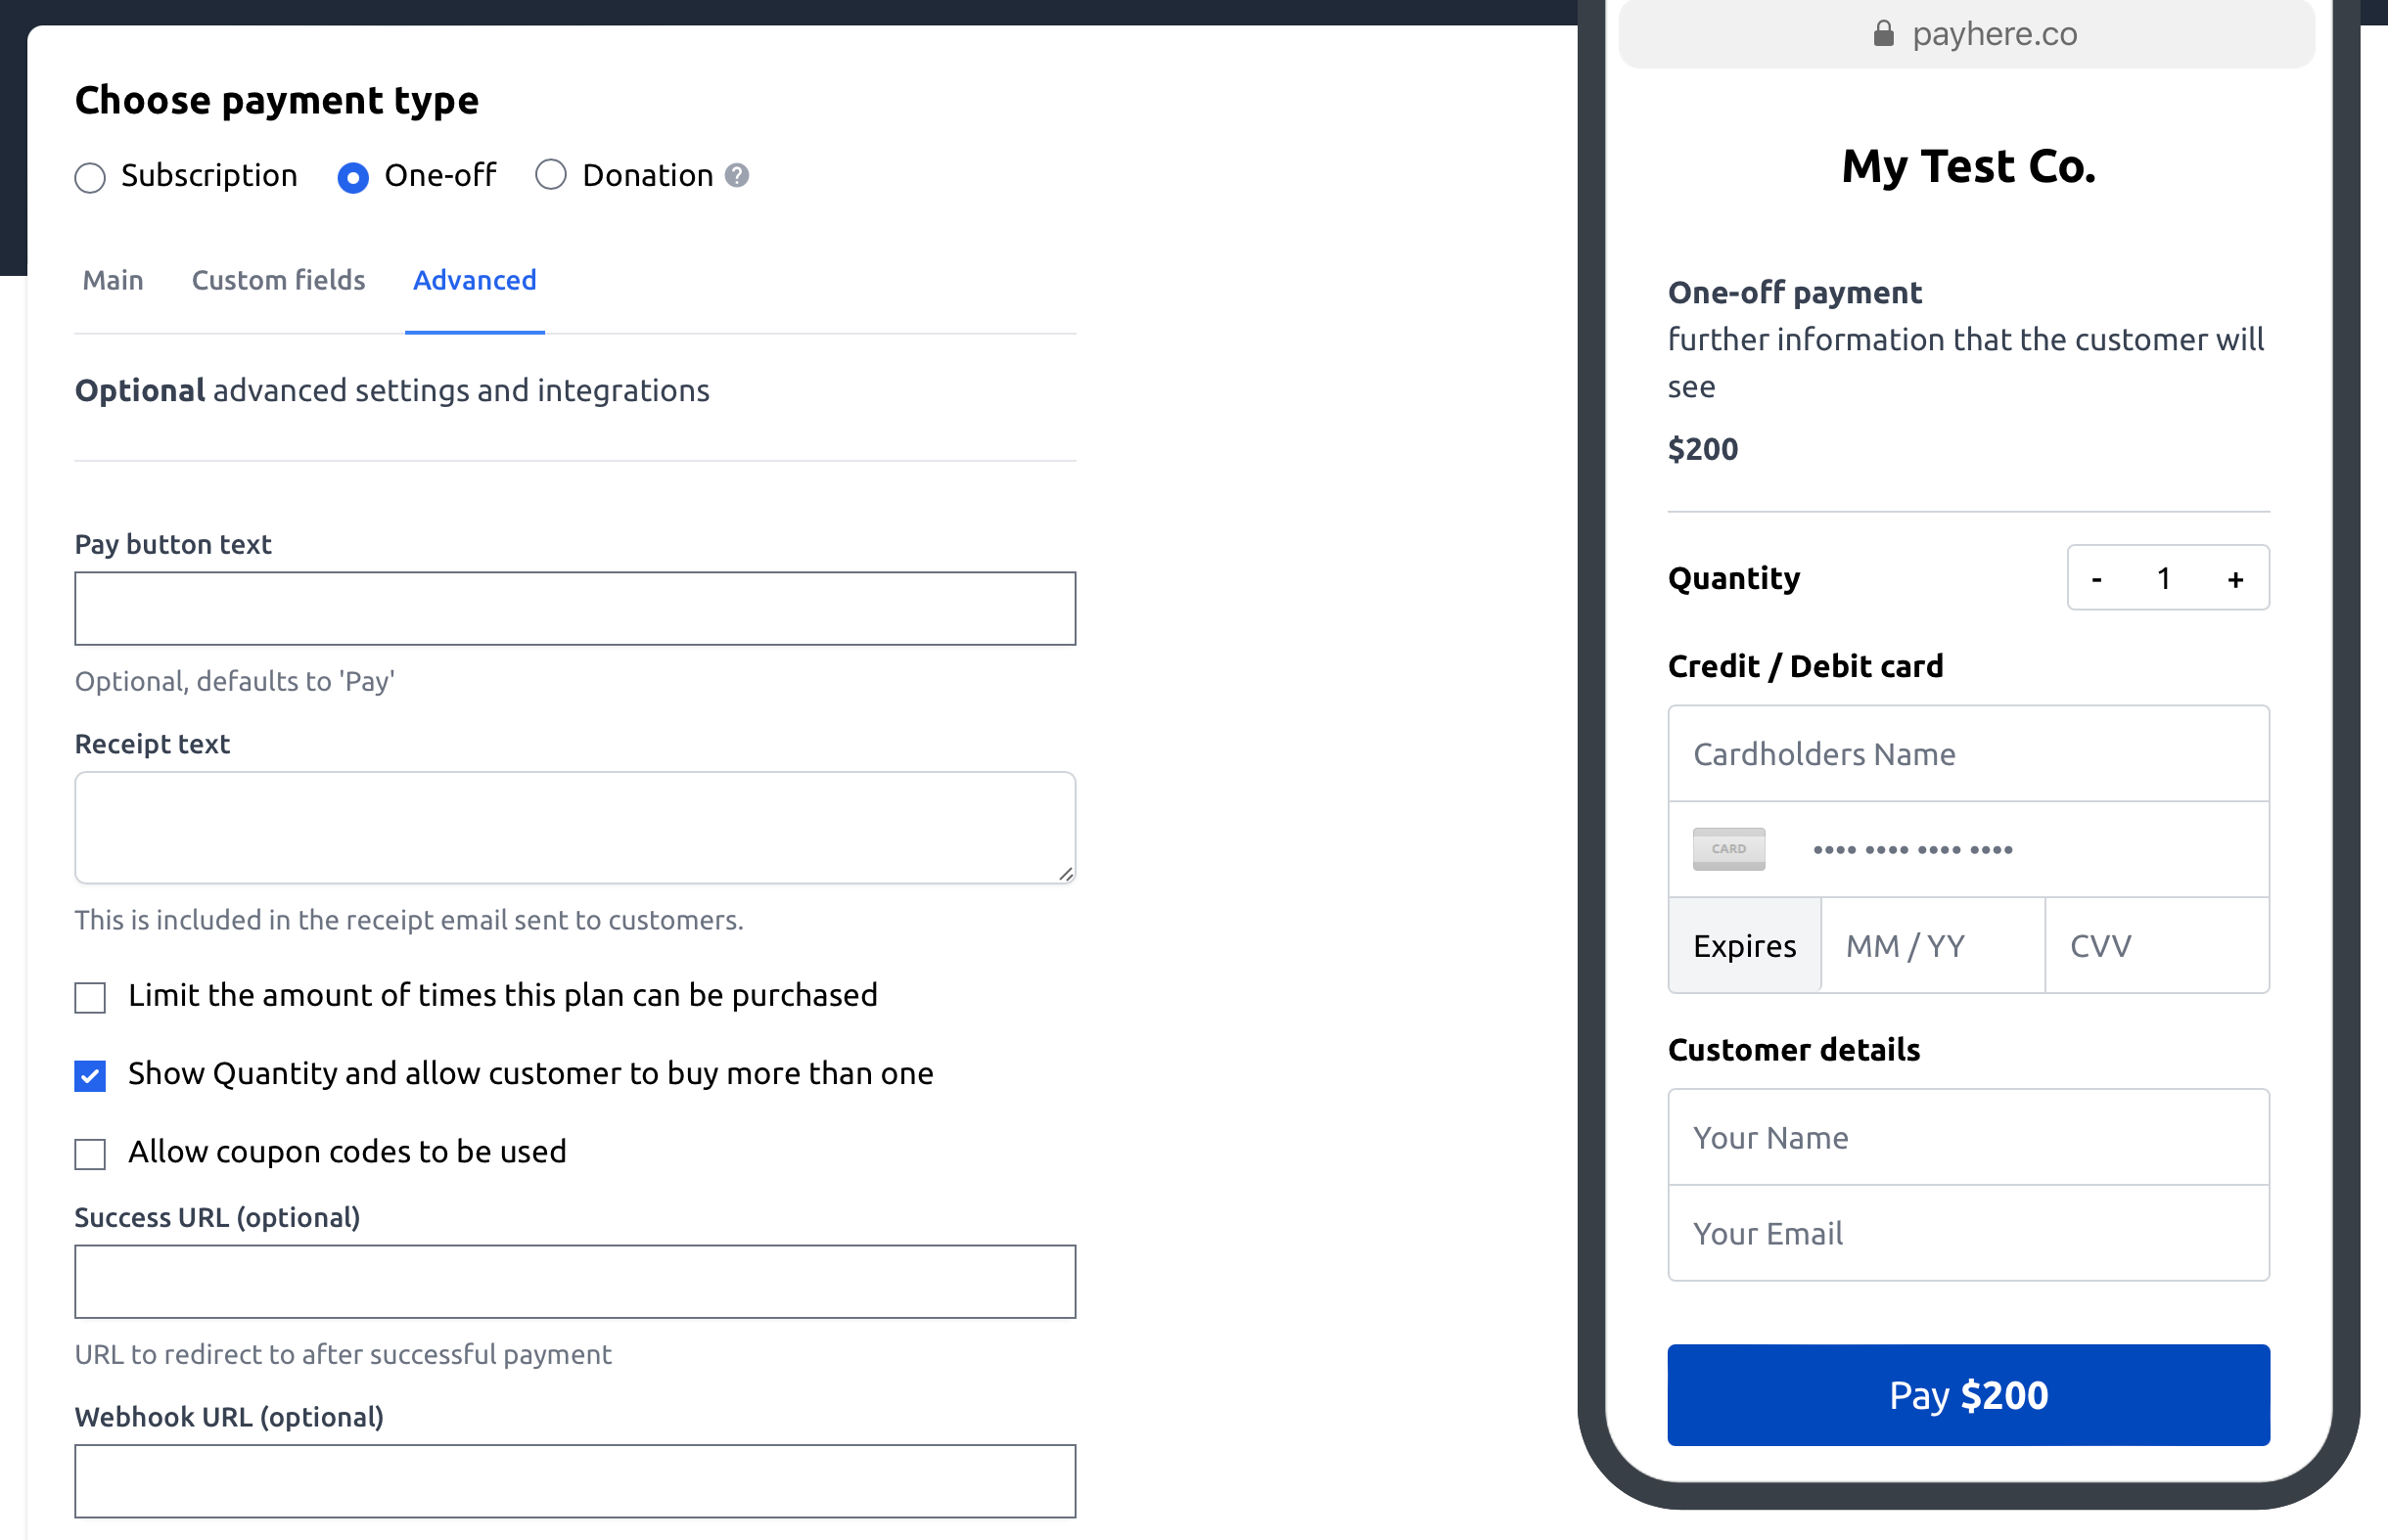
4. Allow multiples to be bought
When creating a plan for a one-off purchase link you will have the option to allow people to purchase more than one at once, as shown below.
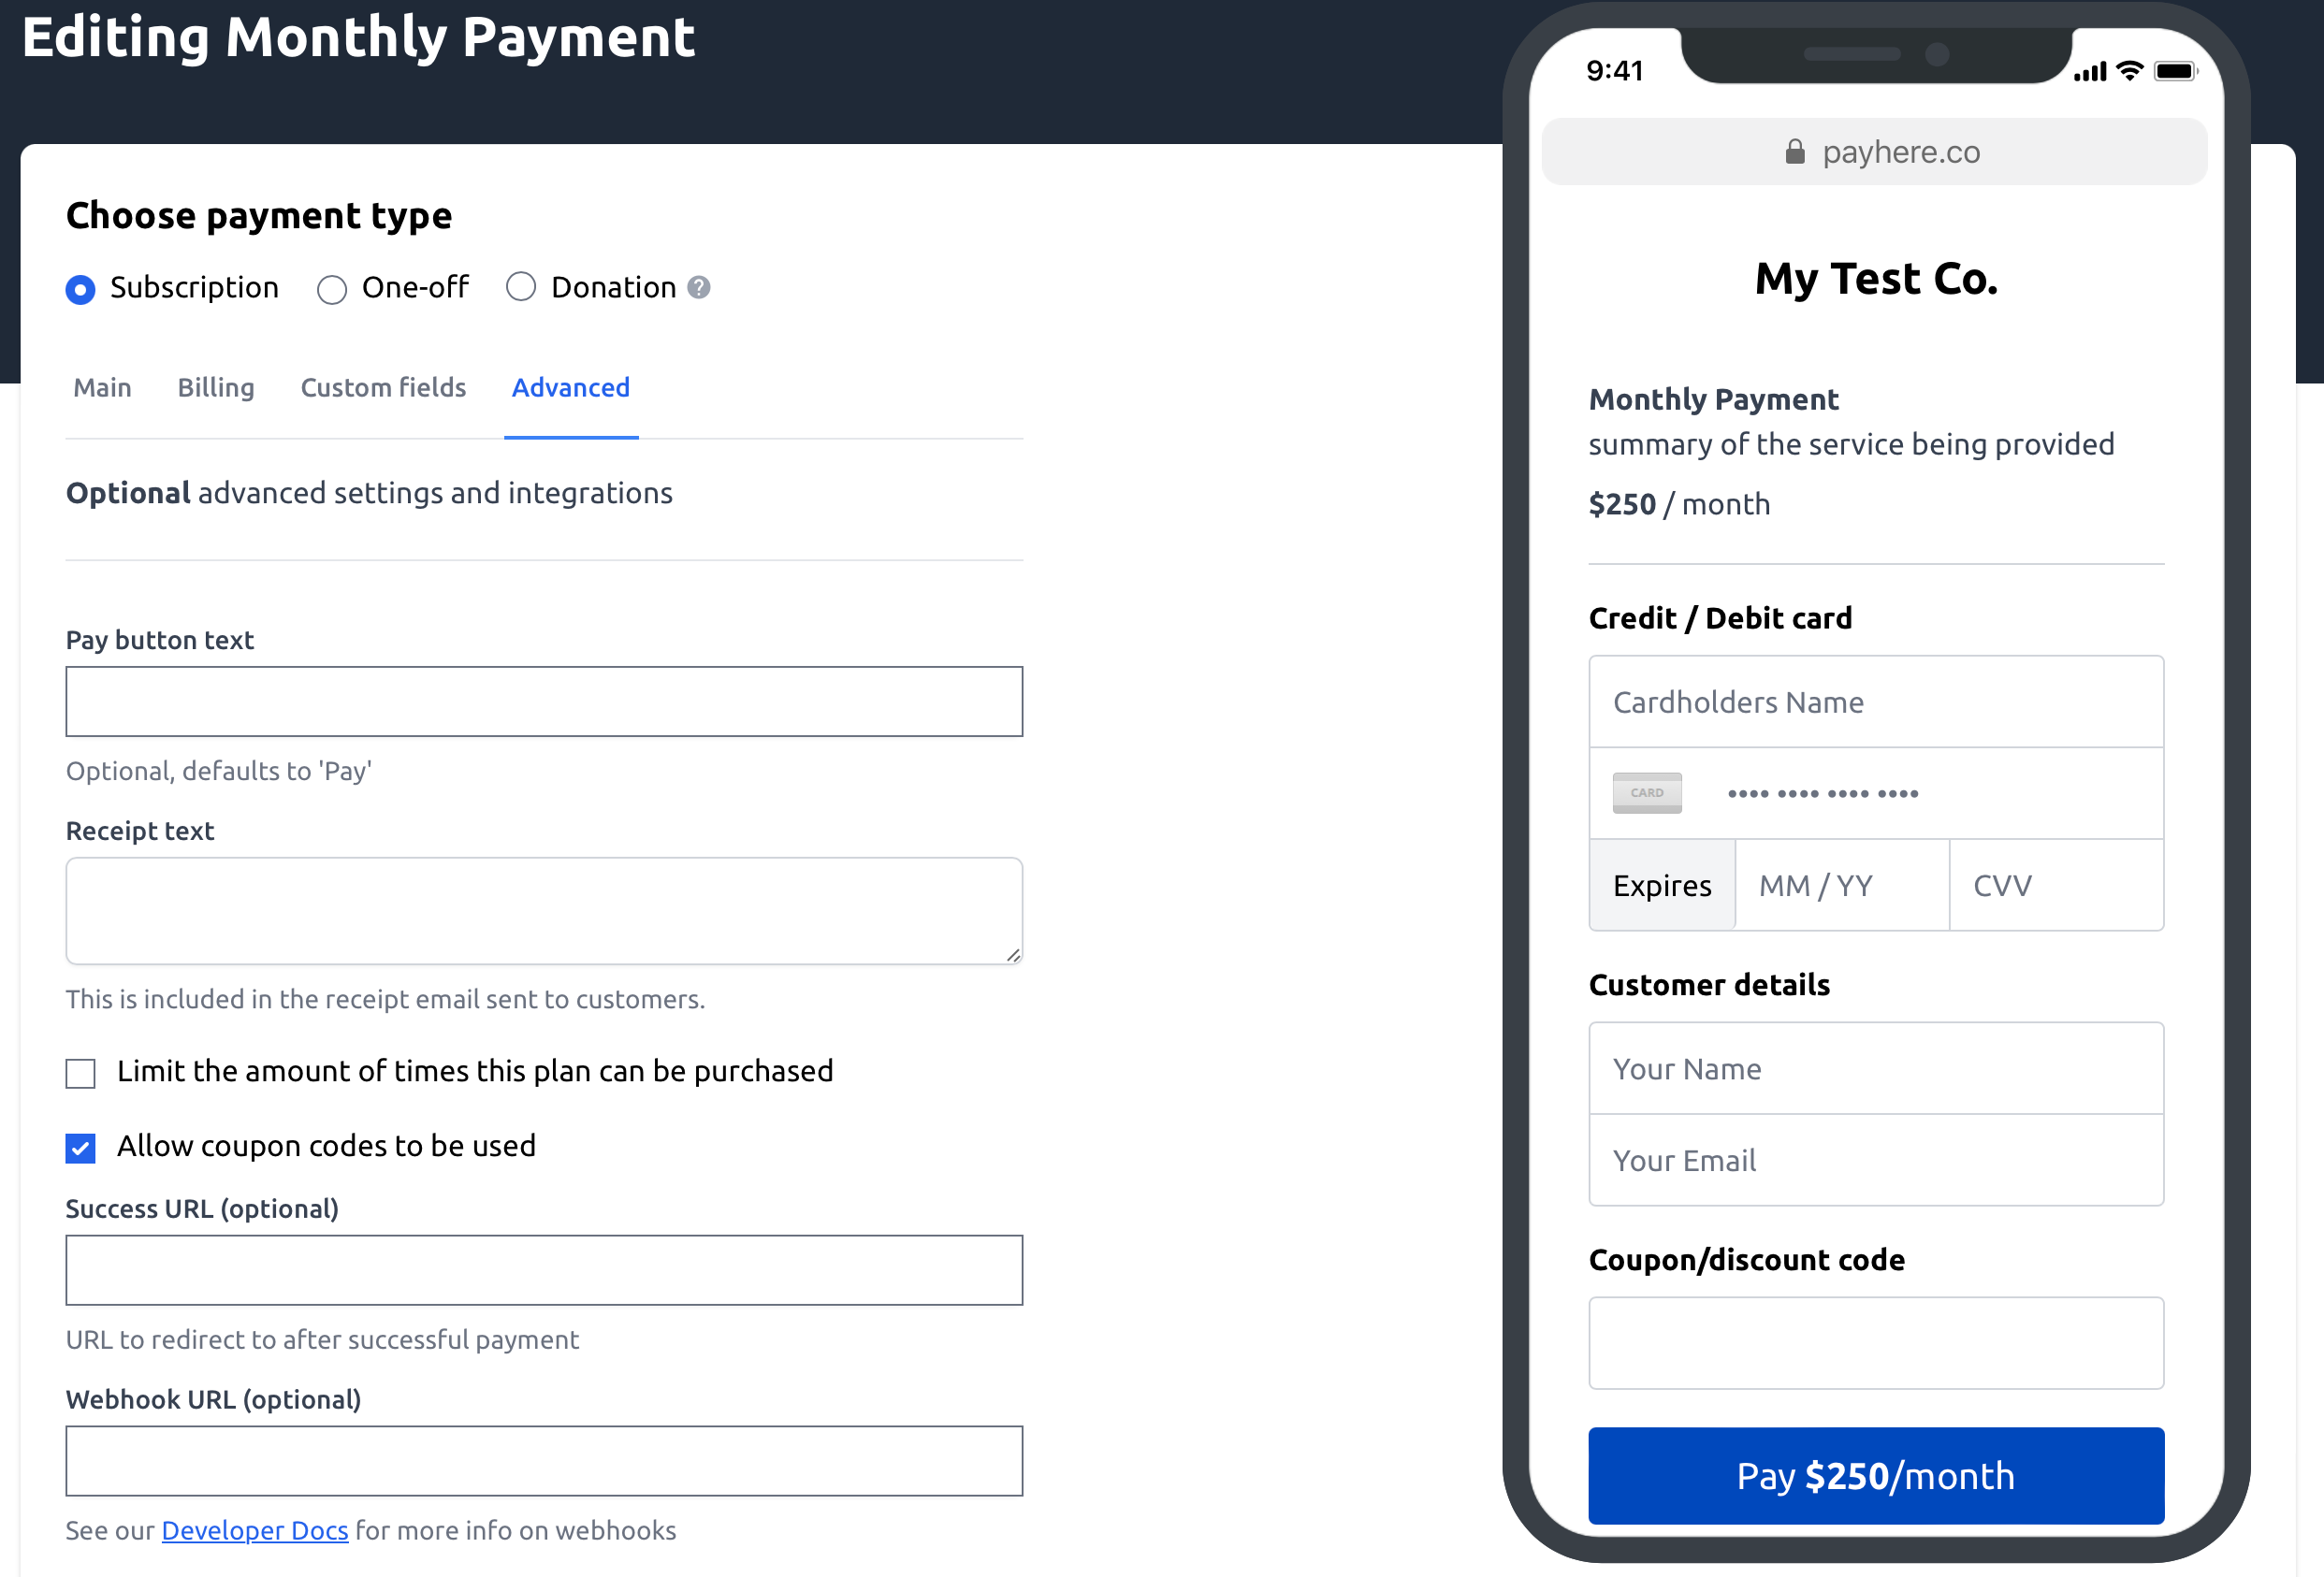
5. Coupons
This is the checkbox that will allow coupons to be used by your customer. Please check out our post on coupons to see how to create them.
Once clicked you can see that there is then a text field to accept the coupon.
6. Success URL
This is used quite a lot accross the platfrom and allows you simply to direct the customer or donor to a specific web page after their payment has been successful. This could be a thank you page on your website or next steps etc.
7. Webhook URL
This is for the technical users of the platform, checkout our developer documentations to see how to configure.