No-code subscription payments using bubble and payhere


We have been speaking to many of our users who use the no-code/ low-code platform Bubble, if you haven't used it, definately check it out! It allows anyone the ability to design, develop and host fully functional web apps. Our users have been succesfully using payhere to setup recurring payments in Bubble either for themselves or their client. They see by using payhere that this experience is extremely fast and very easy to implement. Within this post we will show you, using a very simple project example, how payhere can help get payments setup within your app extremely quickly!
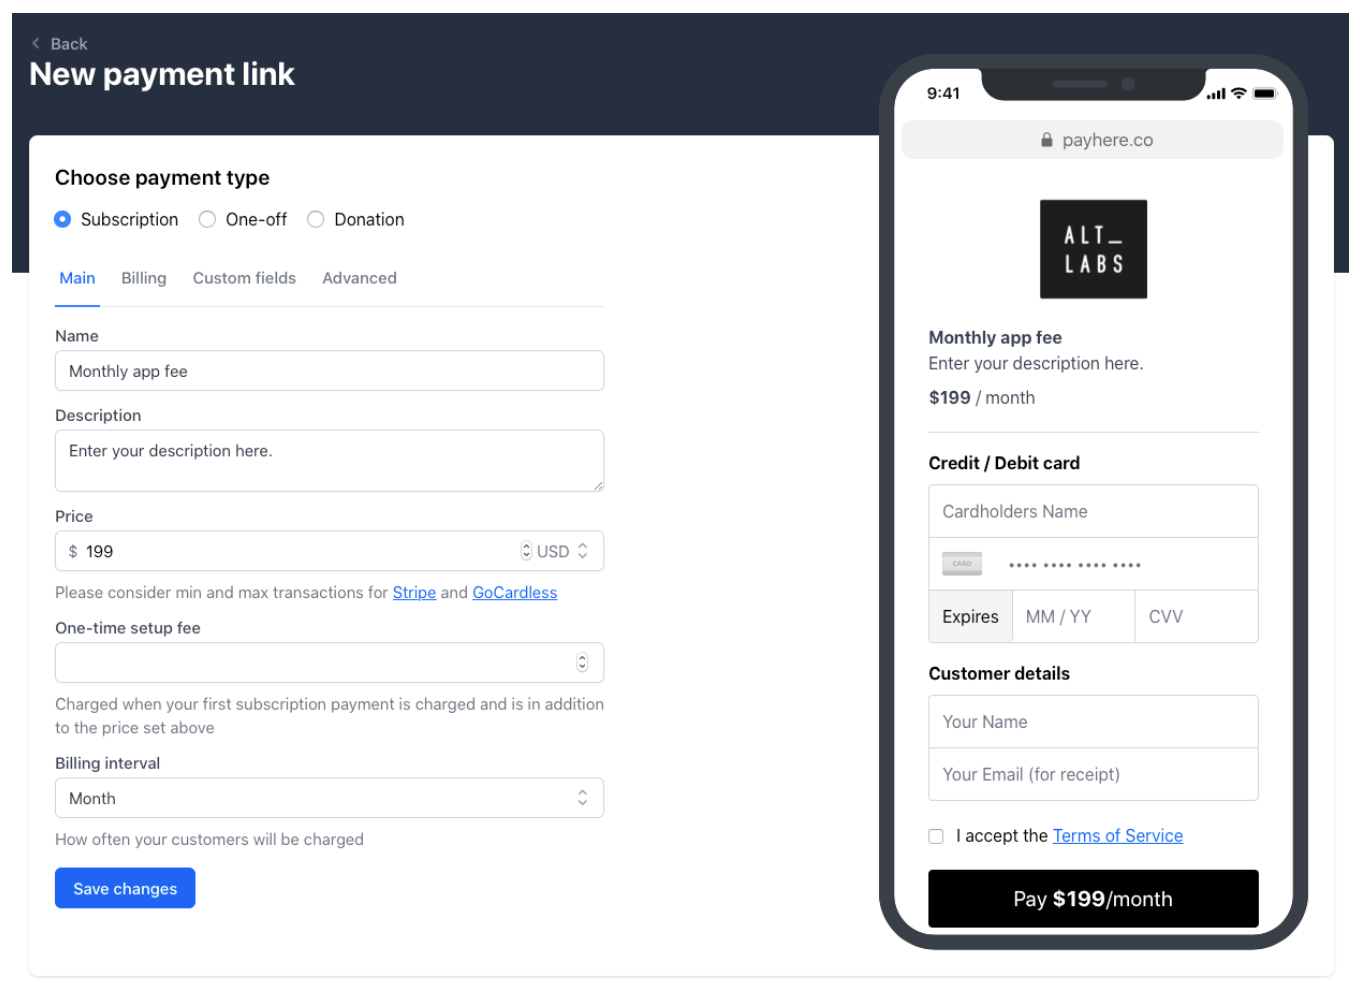
1. Create your plan within payhere.
Within our plan builder you can choose if you want a weekly, monthly or yearly recurring plan. Enter the rest of your details such as name, amount etc and then save the plan.
If you want to direct your customer to a certain page after a successful payment (thank you page, create password etc) now is the time to do so. Within plan creation select advanced and you will see where you can enter the success URL.
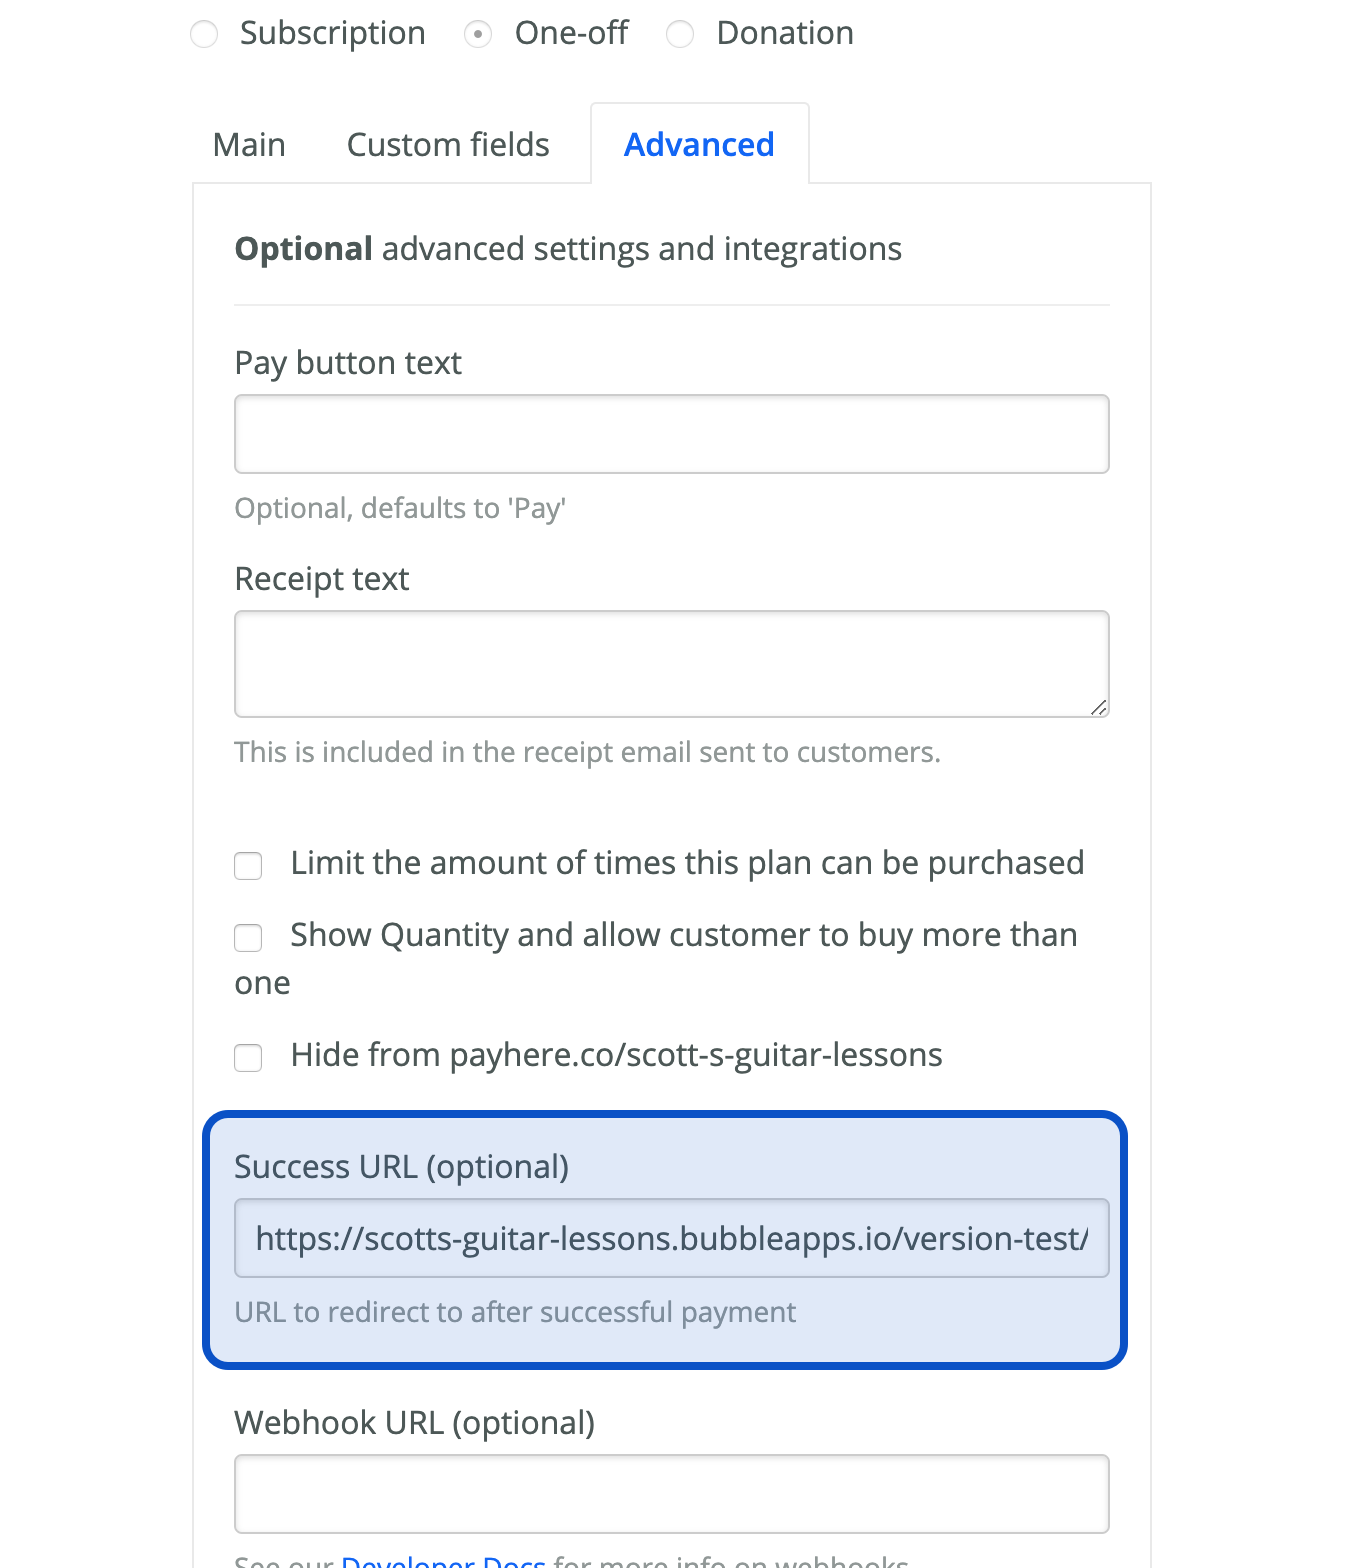
You can then copy the link that we have created for you to your payment page.

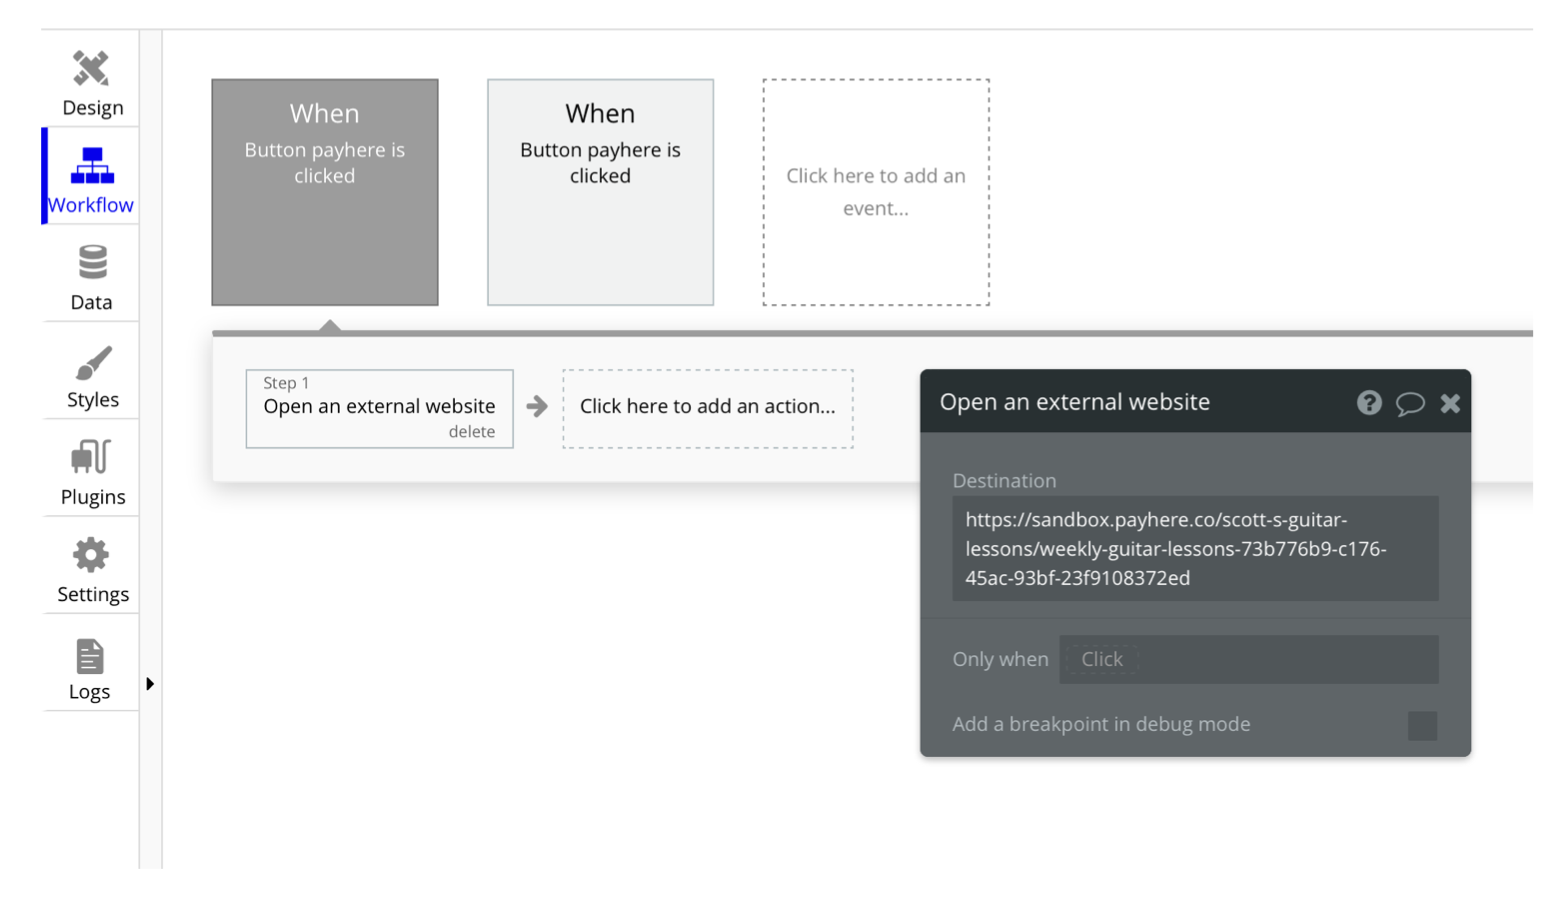
2. Link button on Bubble out to plan URL
Once you have created your button on Bubble right click on it and open the start/edit workflow Then click through on the following- add action, navigation, open external website and enter the URL in the description box as shown below.
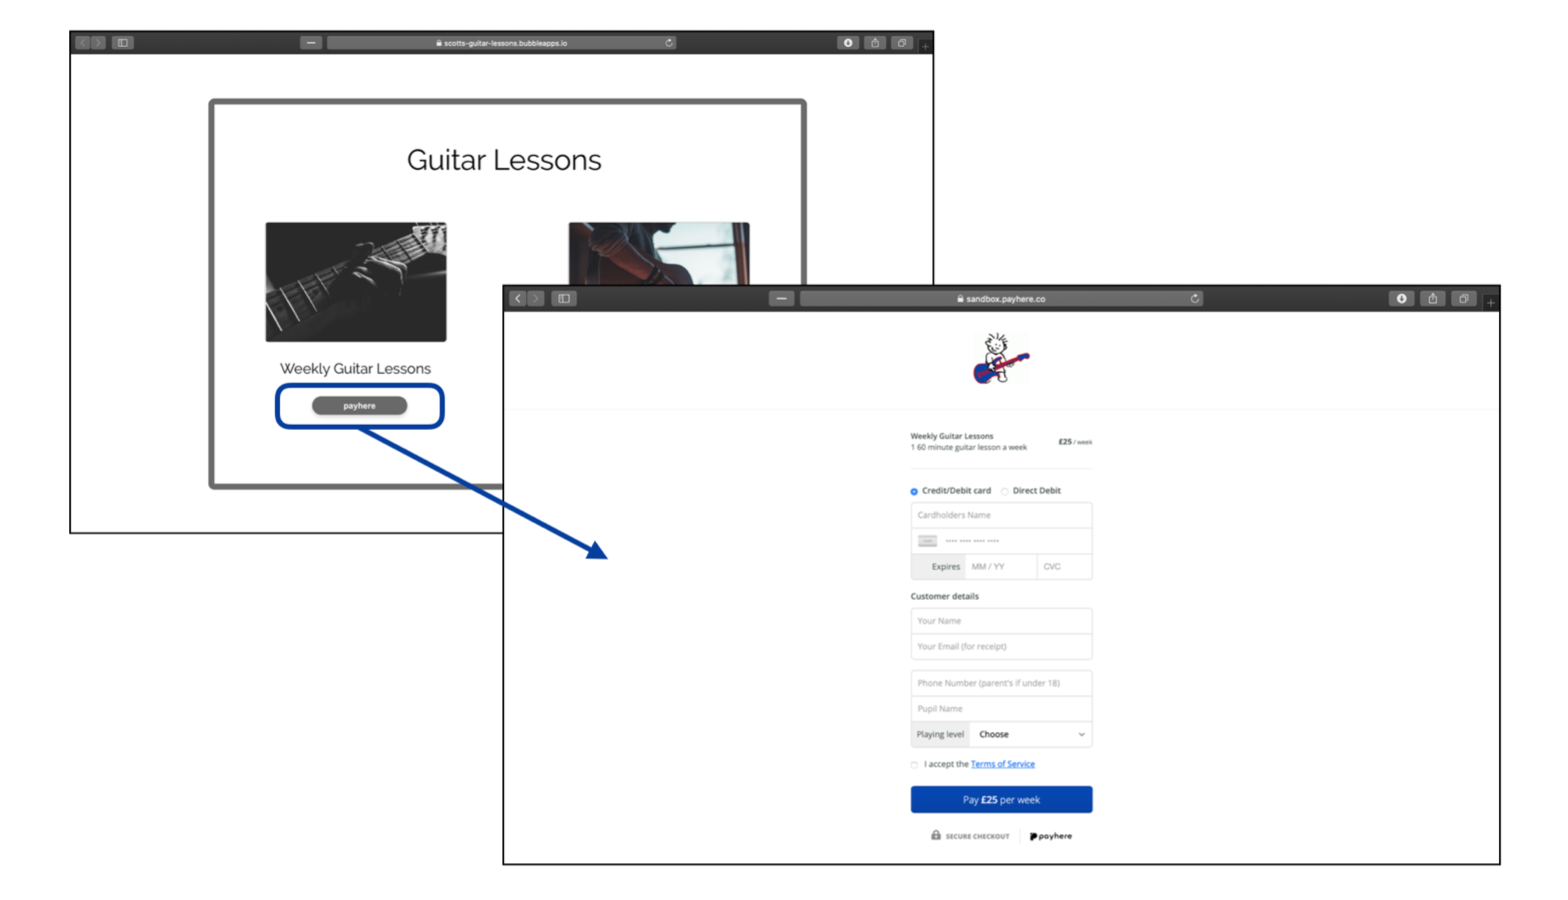
3. Payments are ready to go!
When your app is live and the button is pressed they will be taken to the payhere payment page to enter details.
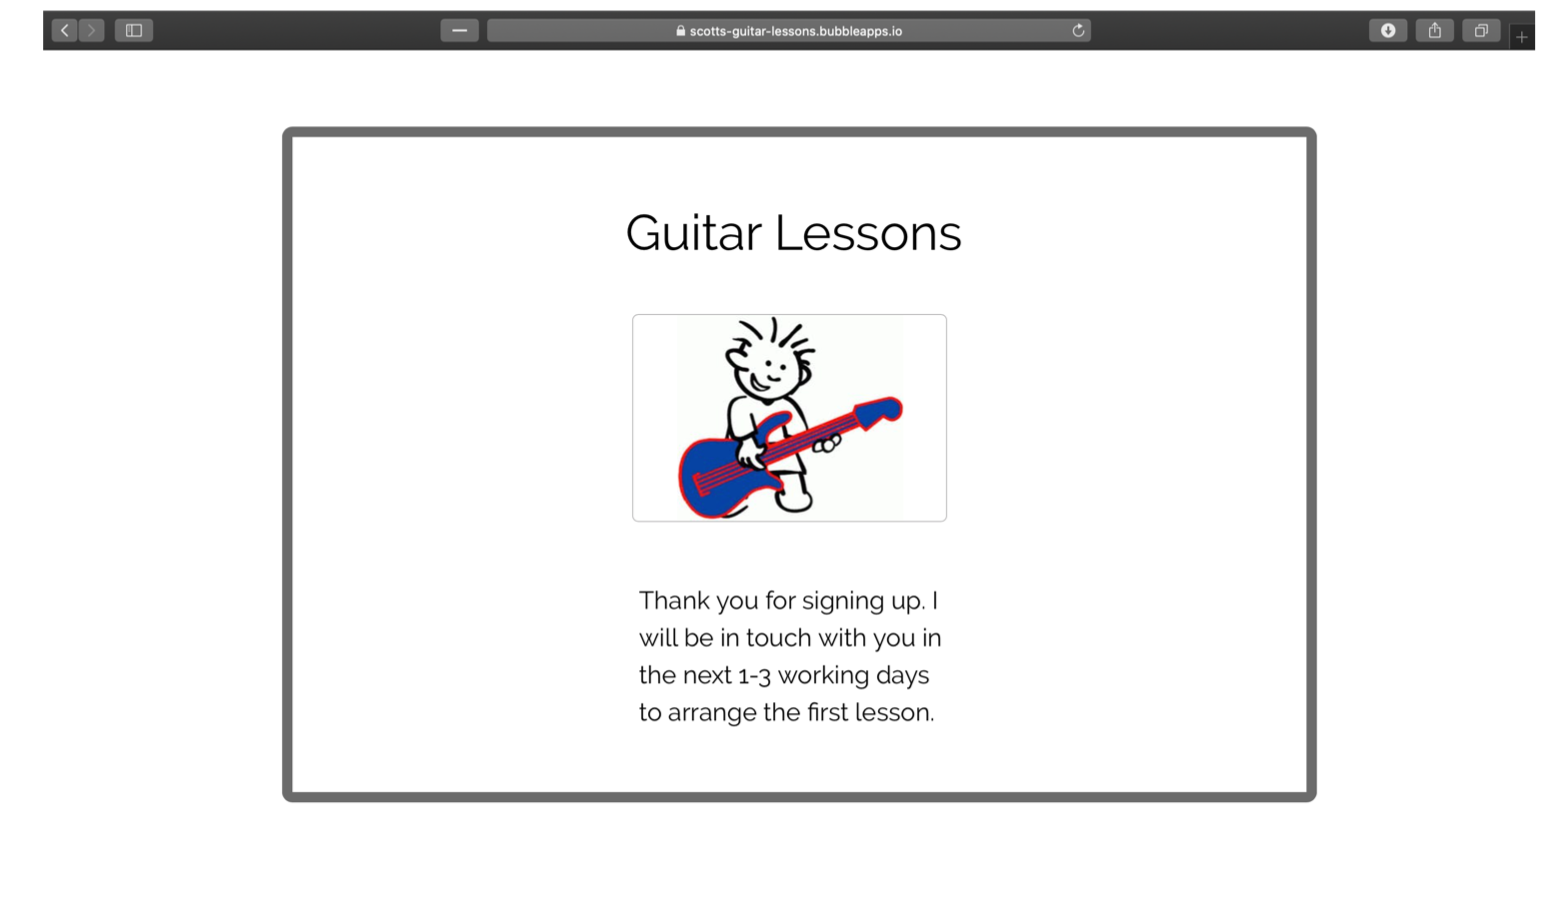
4. Redirect to your selected page after payment.
In this case I simply created another page within Bubble that displays the message that I need to tell my recently signed up customer. This of course could be the next step within an onboarding flow.
If you have any more questions or queries on how to do something do not hesitate to reach out to us at support@payhere.co