
Using custom fields to collect more information

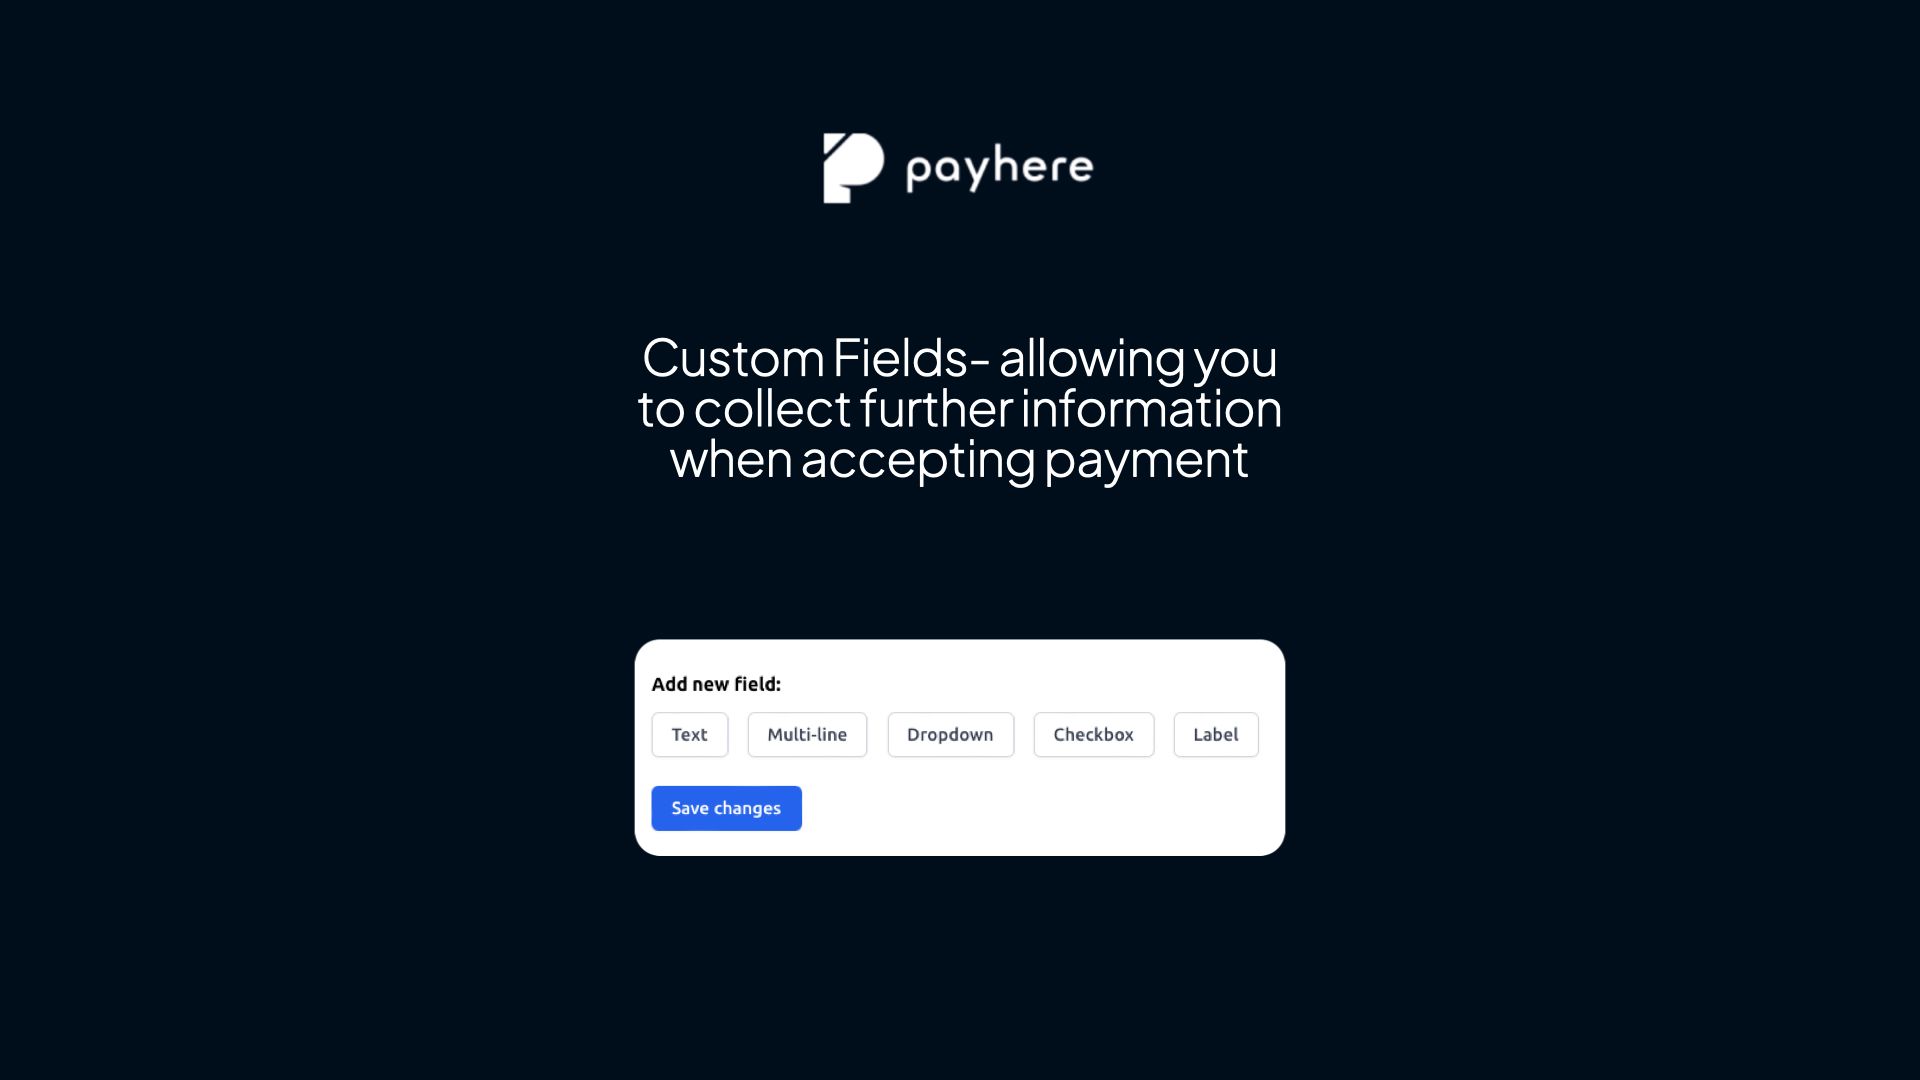
Using custom fields within your payment plans provides a way to collect further information from a customer or donor. We have several different ways to capture the data as shown below.
To get started, when creating a payment link you will see (above the payment link name entry) the option to click on "custom fields".
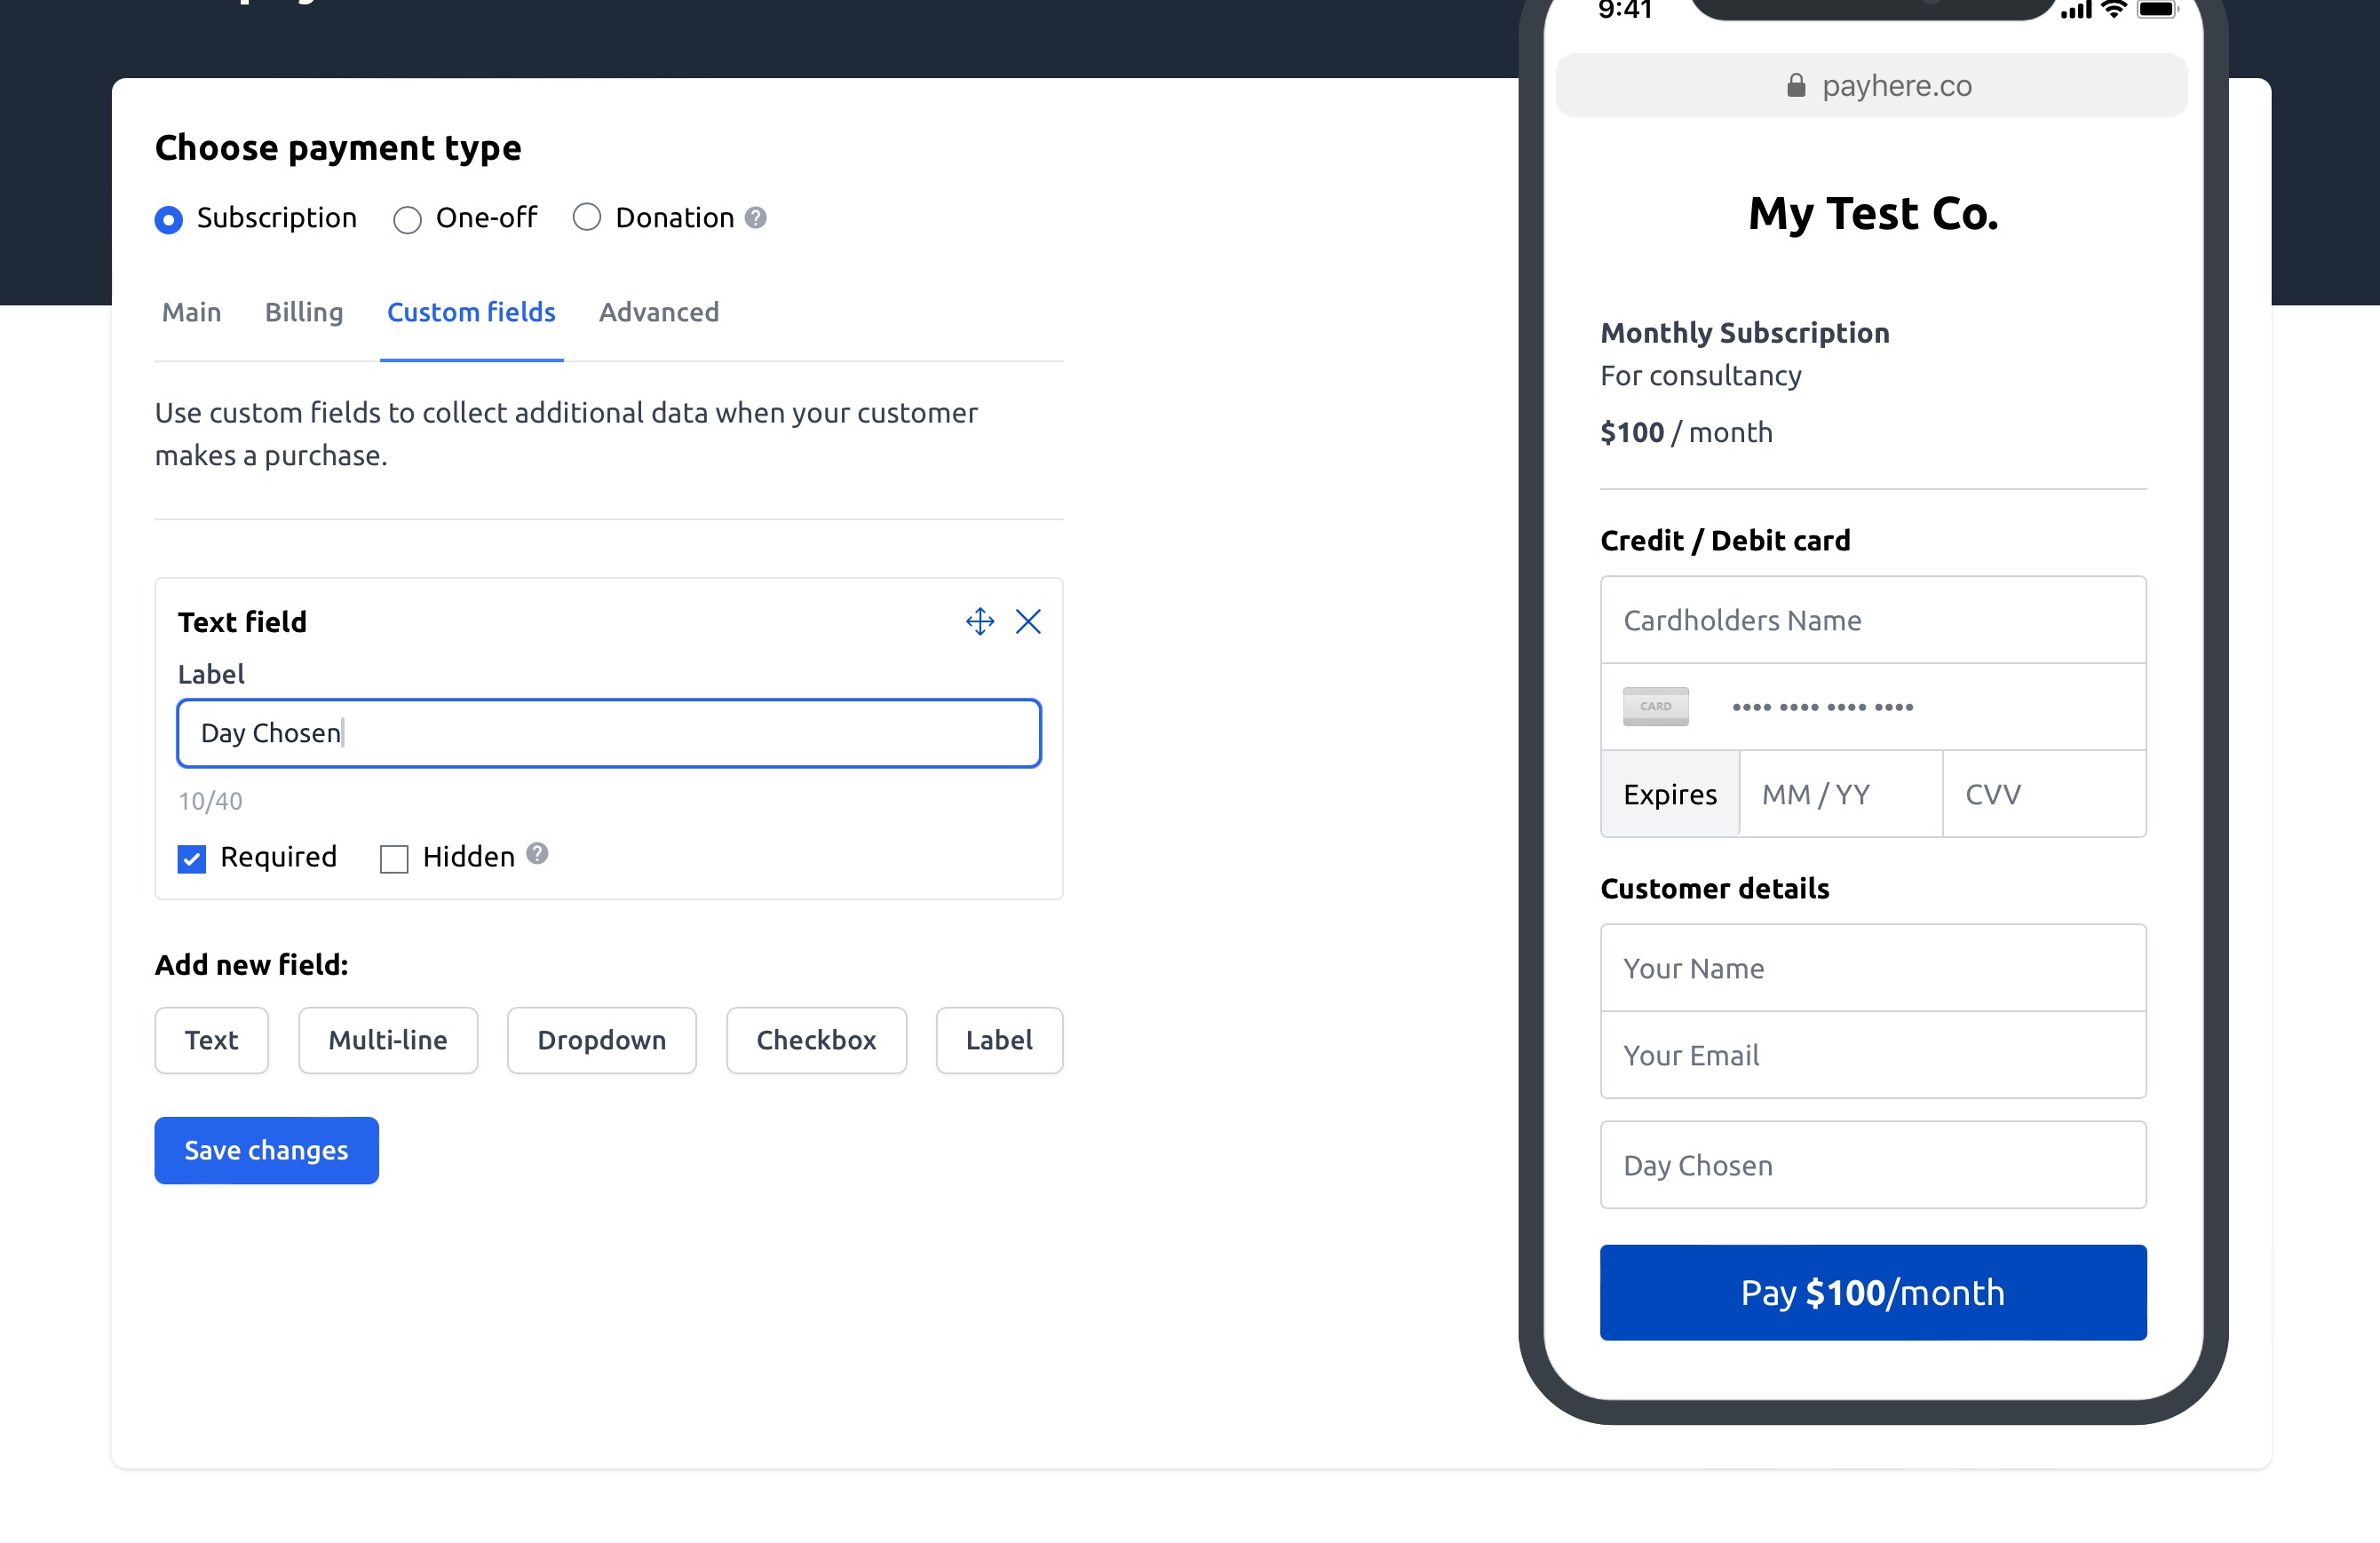
1. Text Field
This will allow the customer to enter a short amount of text, you can see below that we can also make the custom field required- meaning that this information will be needed in order to complete the payment.
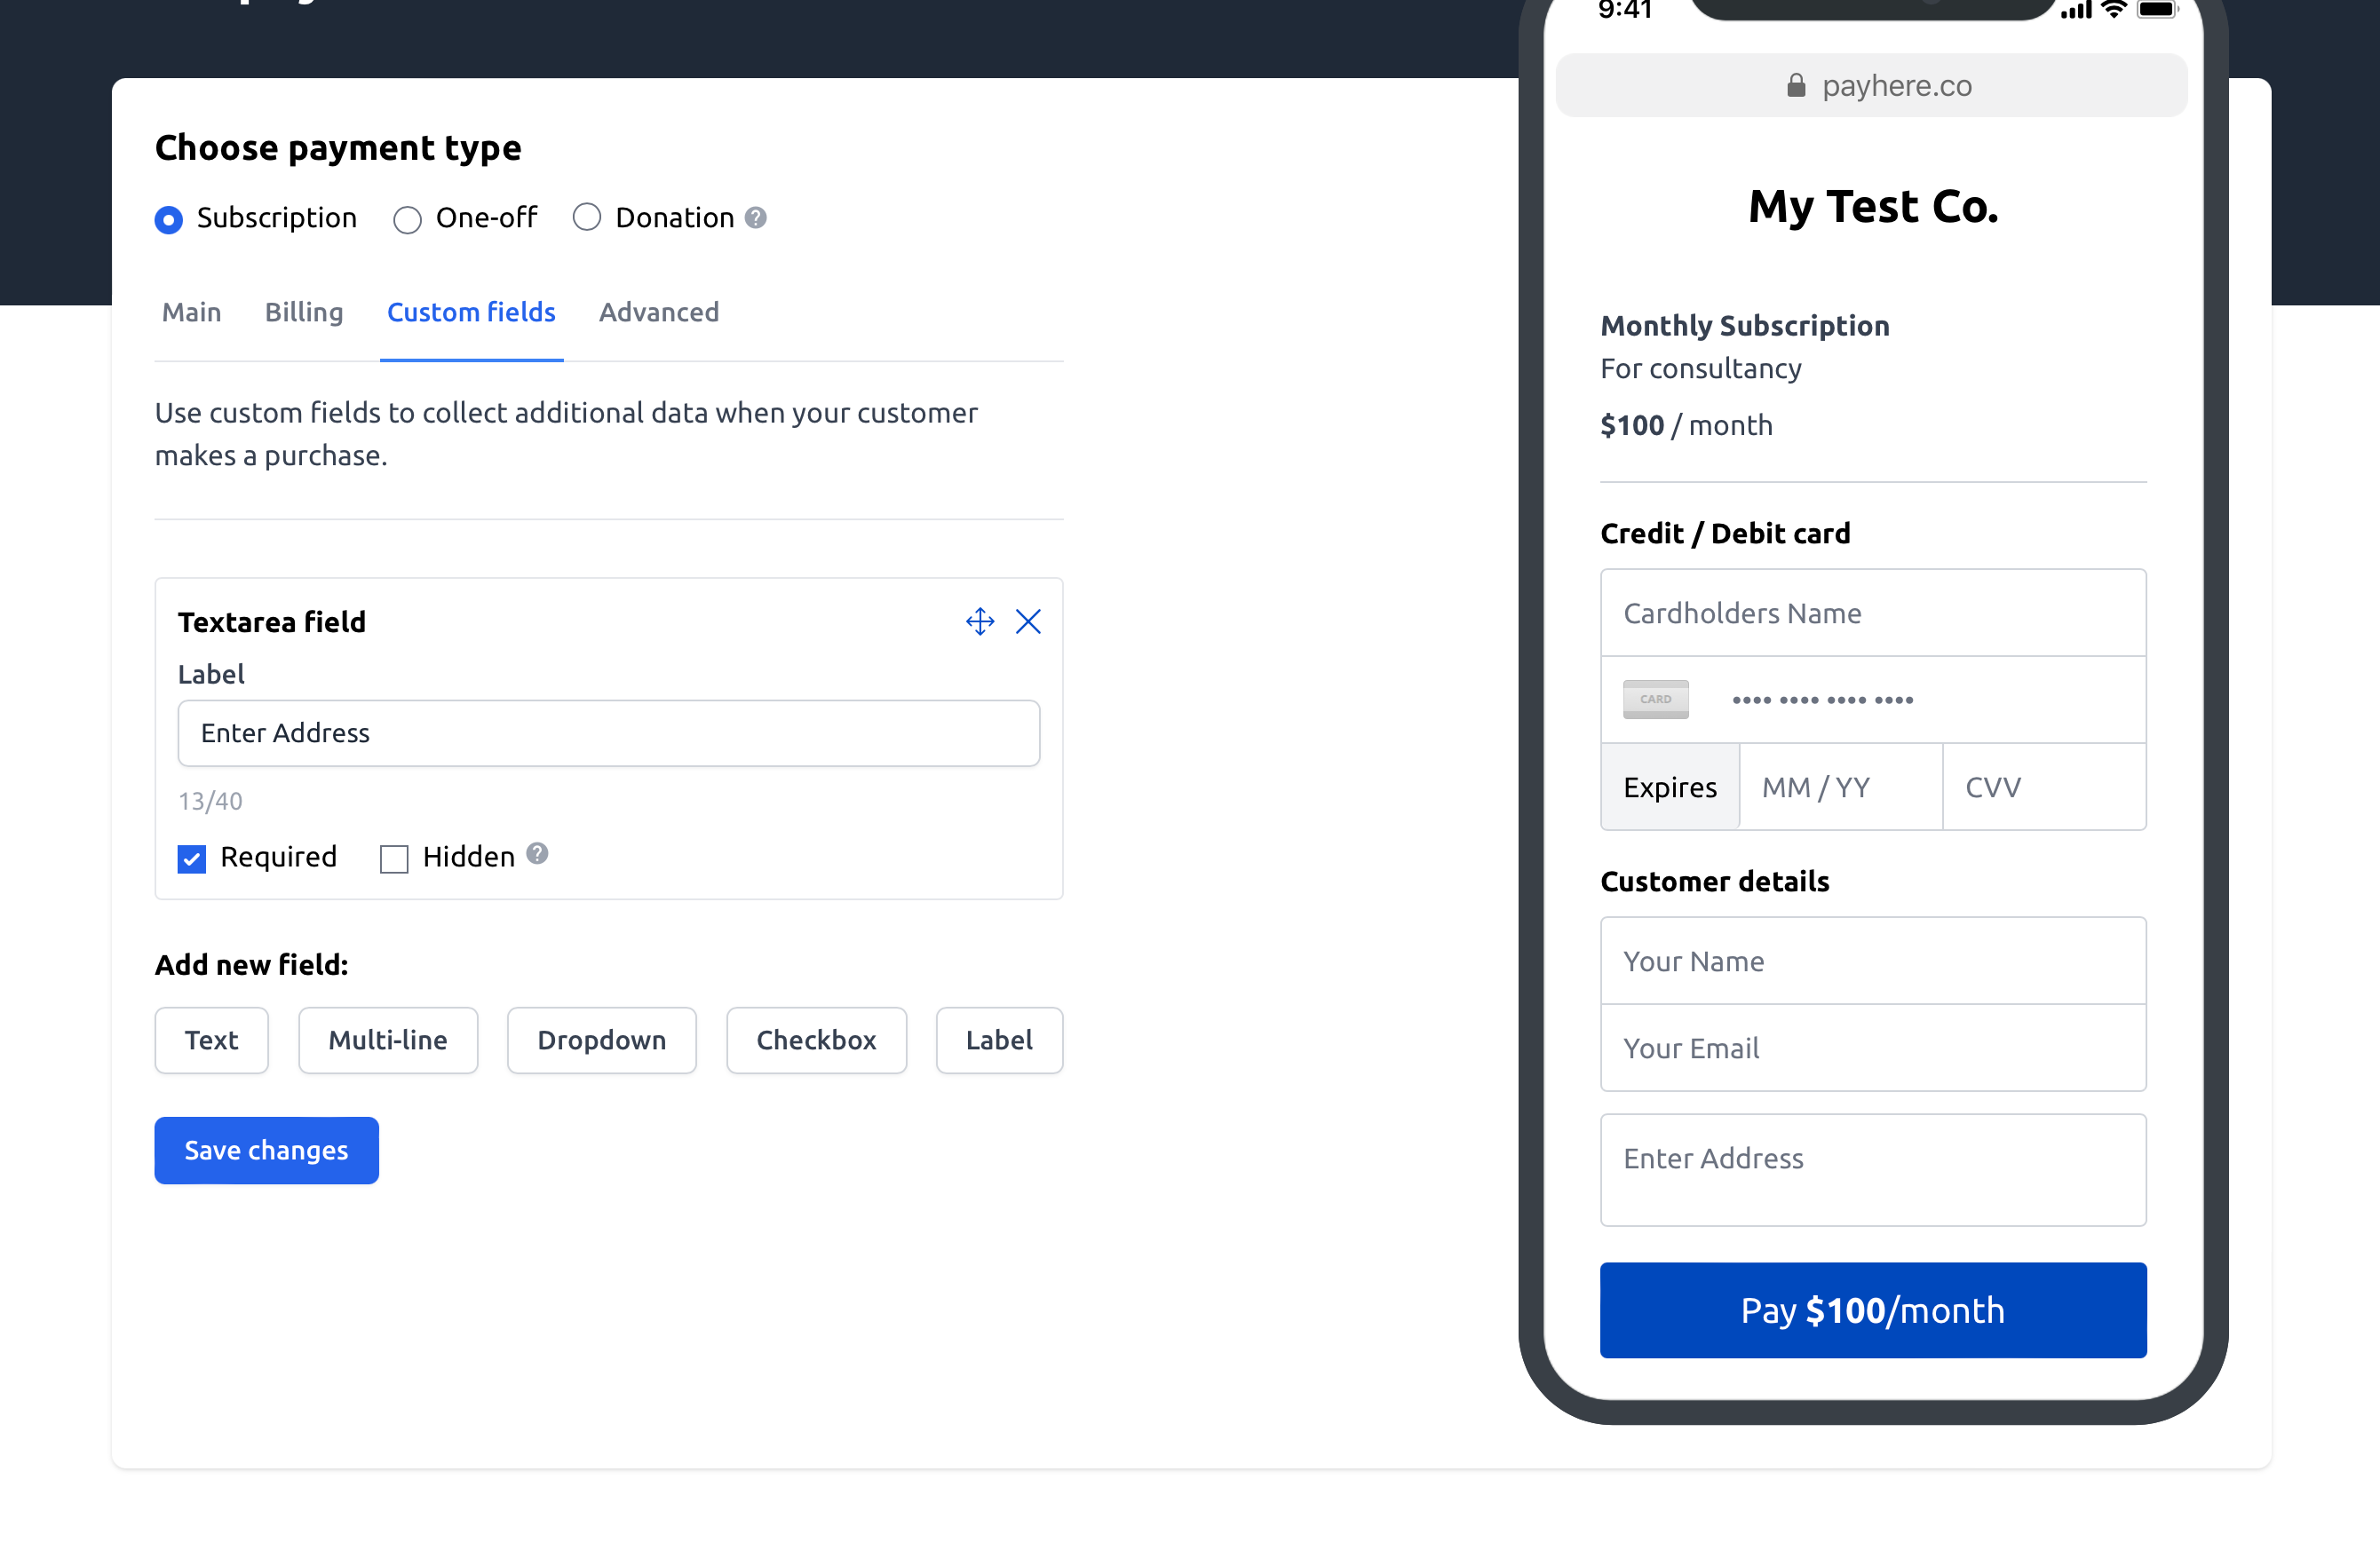
2. Multi-line
Similar to above but allowing a larger amount of text to be collected- we see some of our users ask for addresses with this option, as an example.
3. Dropdown
This allows you to insert pre-defined options set by you for the customer to select. This could be for an am/pm slot for the service you are providing etc.

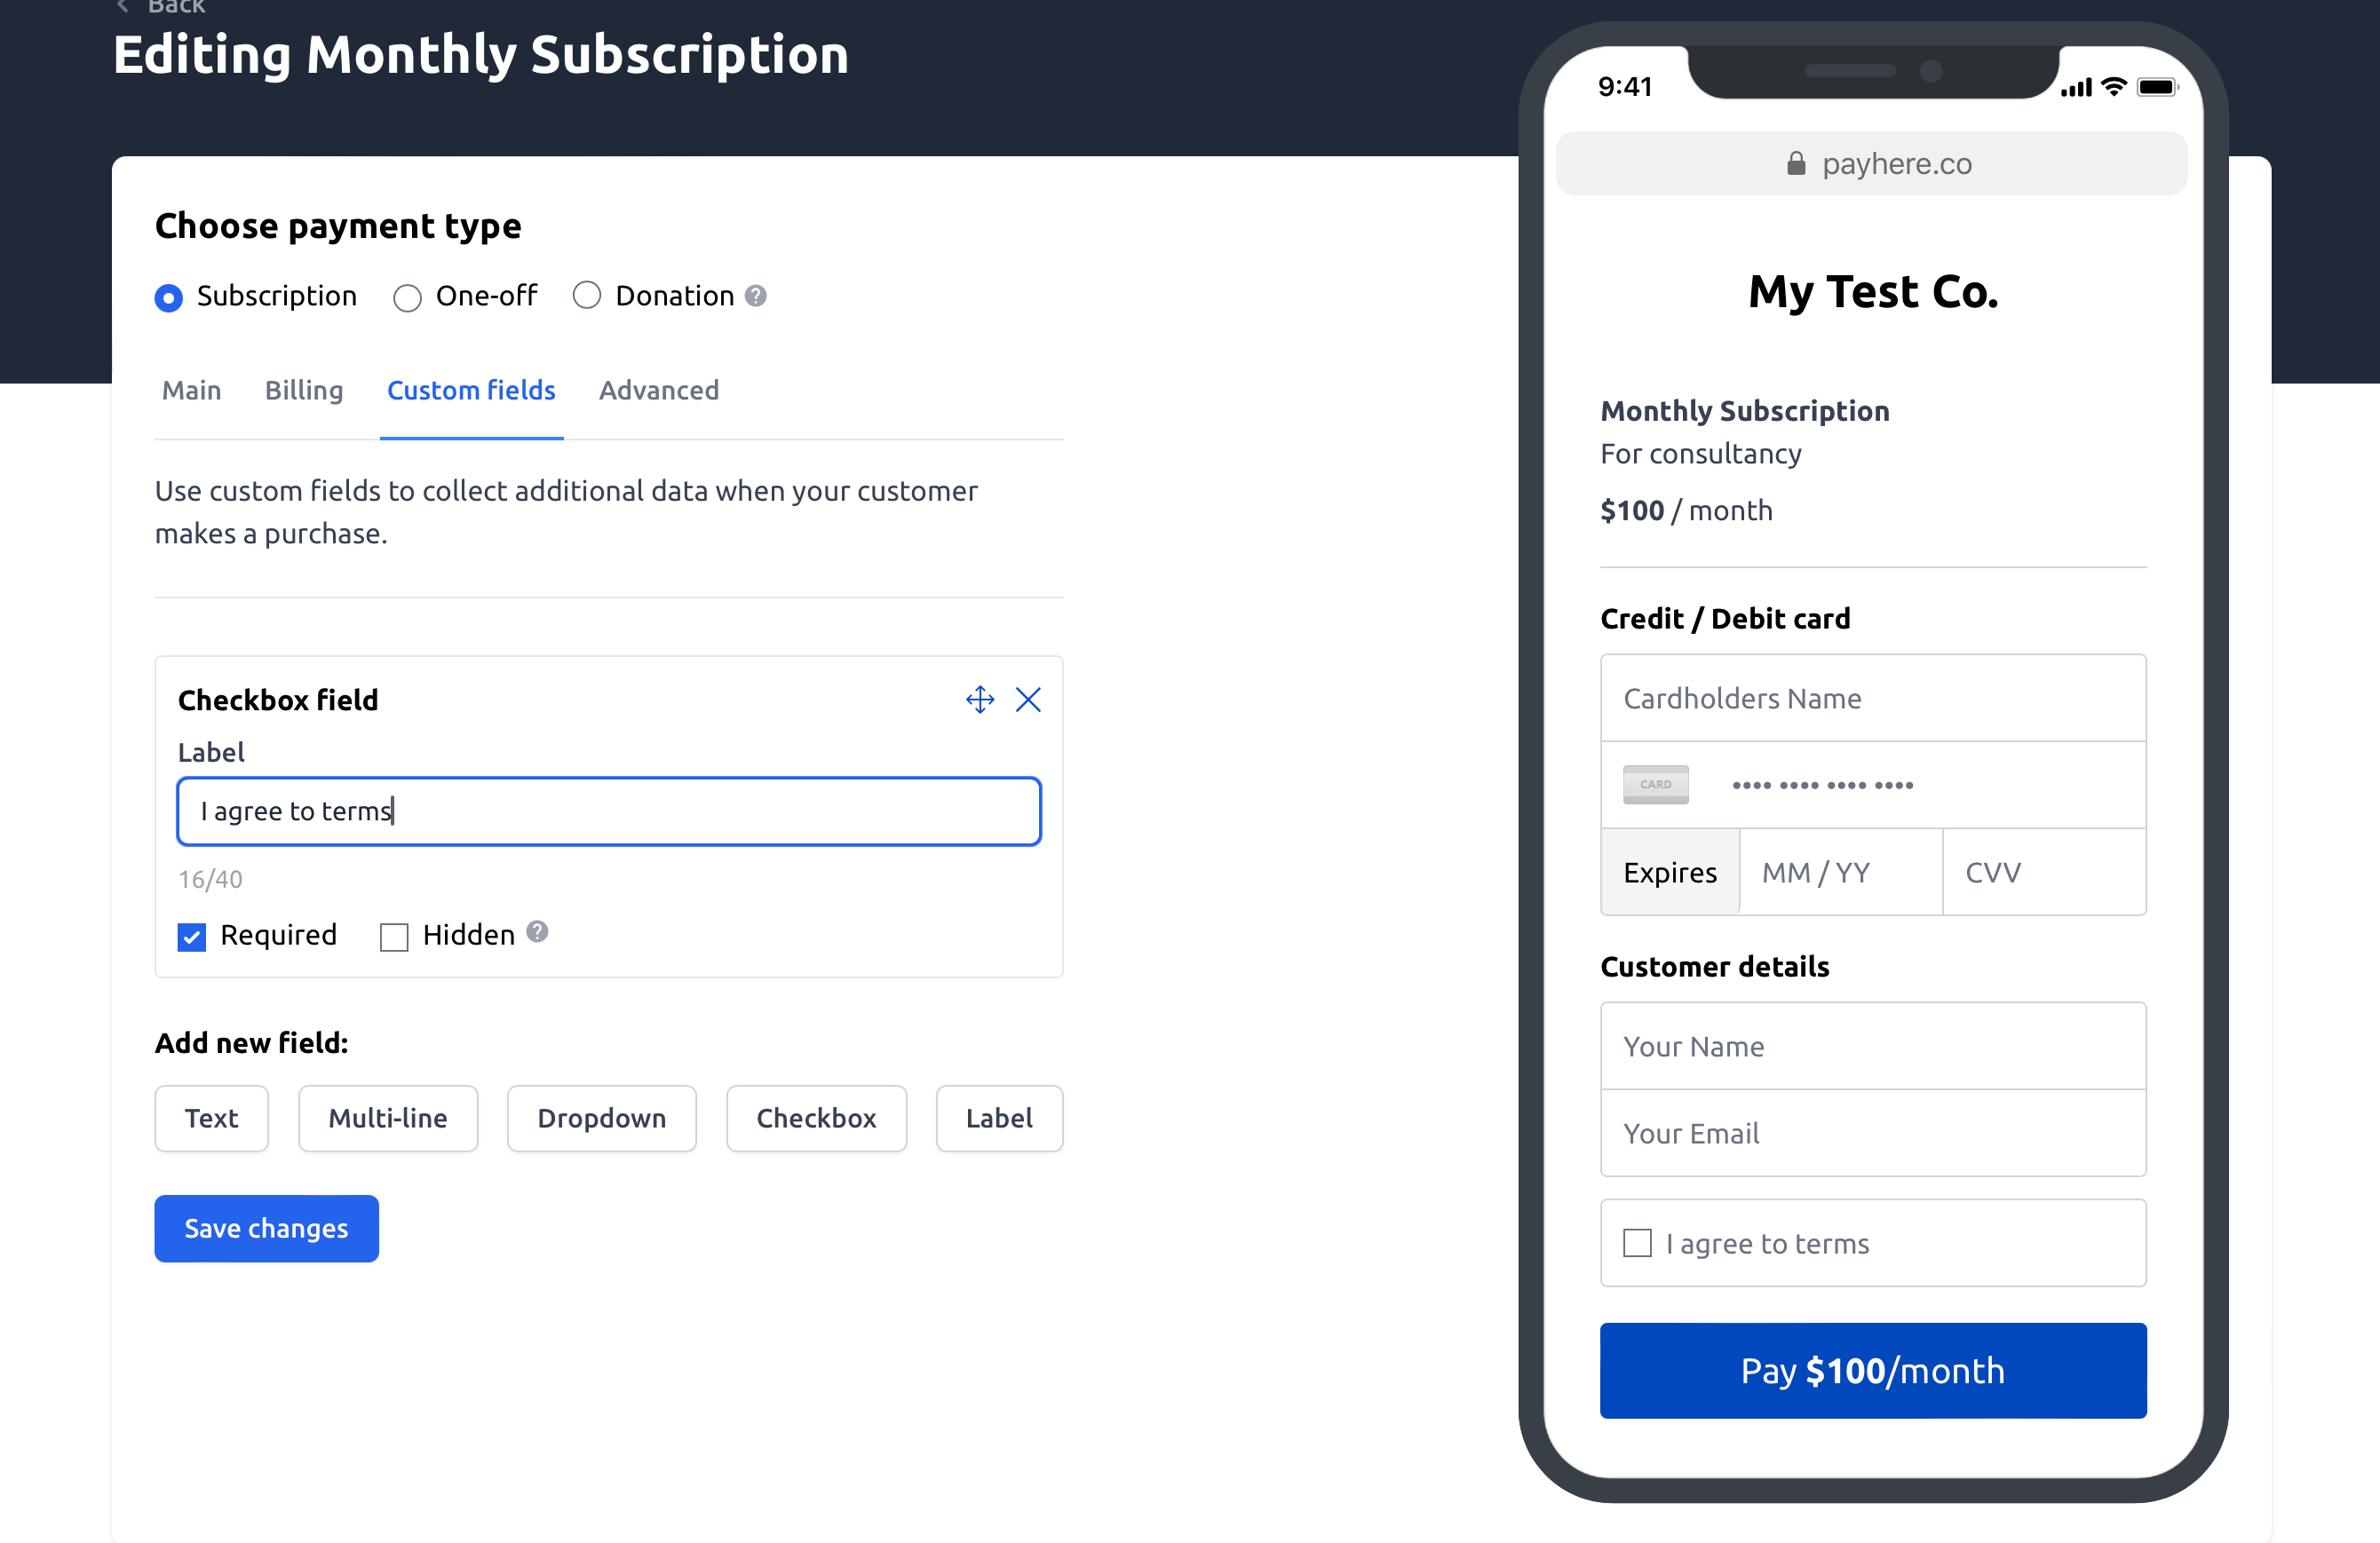
4. Checkbox
Perfect for getting the customer to agree to terms and conditions as an example.
5. Label
A way to enter some text from your side.

Multiple custom fields can be used at once and they can be re-ordered easily.
You will then get the information that has been collected by your user when you get a payment confirmation email. Alternativelty you can click on the payment within your dashboard and be able to see the information there.
If you need any help or have questions- do not hesitate to reach out.